Some time later......  Now with replacement 8.5mm bottom pins and access to a pillar drill I was able to ream the hinges to a tolerance fit.
  This was done with an adjustable reamer, not my first choice but because I was messed about getting the correct size originally this got me through. Adjustable reamers are not the most accurate to use, it took a bit of trial and error to get the exact fit I required, and each pin had a very slight size variation and tapper that effected a tolerance fit.
Hi welcome to my 1964 VW Type 2 split screen campervan restoration blog. This will be a record of the vans restoration, and hopfully share infomation about bringing a splitty back to life.
front door hindge replacement
Porsche brake conversion
porsche-brake-conversions technical info
After having a bit of a break from welding up the van, I spent a few late nights on the net working out the best option for the wheel and brake set up that I'd like. About 10 years ago I bought a set of 15"x6" Porsche Fusch alloys, I later found out from a friend that the guy I bought the wheels from had said they couldn’t be fitted to a van. Well, with that in mind, I saw it as a challenge.
 After reading a few split screen van club forum discussions and a few tips from members, I’ve started by getting hold of a set of front and back Porsche 944 hubs (non turbo) and rear swing arms. This will allow me the choice off aluminium arms or the VW type 3 set up I have had laying in my garage. But that decisions for later.
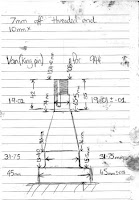
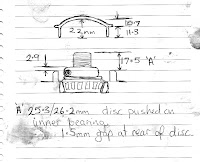
I’ve stripped the Porsche spindles to work out bearing sizes and spindle lengths, I also have a choice of which spindles to try and fit the hubs too. 


- Split 1964 king and link pin drums.
- Bay 1968 ball joint drums.
- Bay 1971-ish small stud Pattern discs brakes.
I spoke with Paul at T3D who along with other bits of advice recommended fitting my king pin set up back on the bus replacing the current ball joint beam I replaced years ago from a scrapped 1968 Bay, as it was cheaper then than getting my original link pins overhauled. This is no longer the case as scrapped Bays are harder to find and link pin referb kits are a lot cheaper. Stripping and comparing the parts, to my surprise the spindle diameters are the same, just the length is different, and sliding the hub on to the spindle with the 944 bearings in the hub I could work out what thickness spacer Ill need for the rear bearing.
Subscribe to:
Posts (Atom)