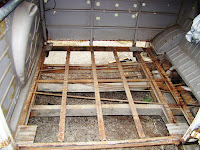
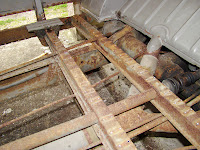
For the second attempt at attacking the floor I managed finish cutting all the way around and pull it up in one piece, although I did have to cut around the jacking points, and the spot welds under the seat rail plates had me stumped until I had a bit of help from a large chisel. The only things that gave me any trouble was the welding on the previously replaced sills. Although the door side was cut away earlier and also where the heater tubes come through the back of the floor, it was hard to get a cutting disc around most of it, so I chain drilled the tight corners here and the other places around the floor that a cutting disc would not fit.
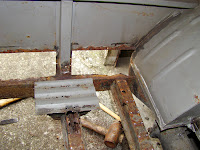
One mistake I did make was along the front edge was cutting too deep through the floor and into the front support beam that was in reasonable condition. This means I will have to remove this support without damaging the lower edge of the forward bulkhead lower skin that this support is spot welded to. I am not sure how much trouble this will be.
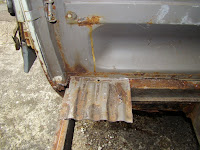
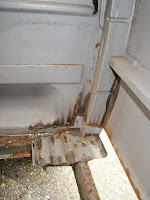
As for the forward and back cut edges where the floor is folded up and spot welded I went round and peeled these remaining strips away by pealing and twisting the metal strips causing the welds to pop away leaving a small raised weld to grind off. This is a lot easier that grinding off the whole strip or drilling each weld but it could distort the good panel which is easy enough to tap straight again, but in the worst case it could rip away the weld so be careful when you do this. The edge of the floor that attaches between the rear wheel arches and the lower part of the forward engine bay fire wall is S shaped and not a simple 90 degree L shape as I thought, so I'll be leaving this part in tacked until I see what the new floor looks like.

 For the second attempt at attacking the floor I managed finish cutting all the way around and pull it up in one piece, although I did have to cut around the jacking points, and the spot welds under the seat rail plates had me stumped until I had a bit of help from a large chisel. The only things that gave me any trouble was the welding on the previously replaced sills. Although the door side was cut away earlier and also where the heater tubes come through the back of the floor, it was hard to get a cutting disc around most of it, so I chain drilled the tight corners here and the other places around the floor that a cutting disc would not fit.
 One mistake I did make was along the front edge was cutting too deep through the floor and into the front support beam that was in reasonable condition. This means I will have to remove this support without damaging the lower edge of the forward bulkhead lower skin that this support is spot welded to. I am not sure how much trouble this will be.


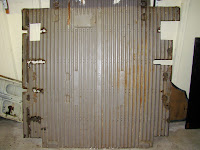
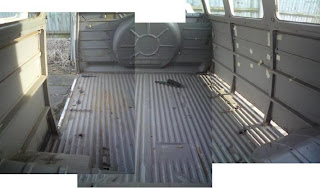 After a struggle drilling off a few rusty screws heads I was able to removed the rear pop outs to unearth some tiny pinhole rust spots in the gutter. I then cleared out the remaining interior, attachments, wires, insulation, gas pipes and old coppers (coins not Policemen) to get a good assessment of the whole cargo bay.


