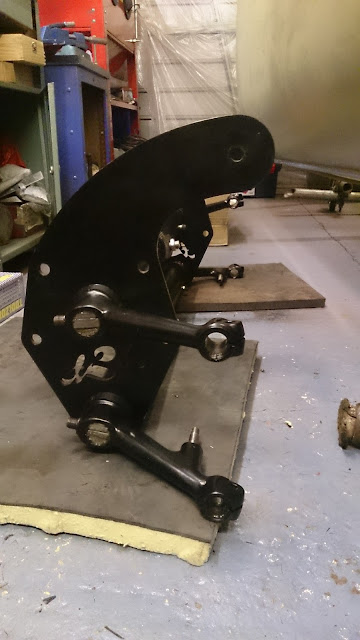
Reaming Narrowed Front Beam Bushes

After narrowing my front beam trailing arms I fitted them to my new narrowed front beam but the new beam did not come with instructions. The nylon bushes inside the tubes were smaller than the bearing surfaces of the trailing arms, but I found this out the hard way.
 
I'd pressed the trailing arms into the tubes with a few big swings of a large mallet to find the arms would not rotate once home, and I'd pushed the outer bearing into the tube, this made me wonder what Id done to the inner bearings
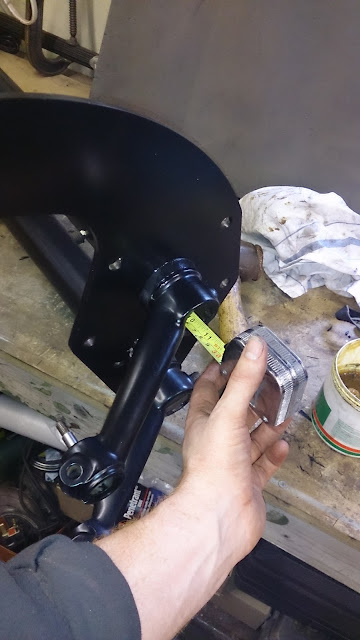
Using a measuring tape I was able to feel and measure that the inner bearing was pushed in over half way. It was a heavy hammer.
After a lot of pondering and a few trial wack's with a hammer I realised I needed to use a pulling tool get the trailing arms back out. So I made a pulling disc that was threaded and machined just under size of the outside diameter of the trailing arm with a step on it so that it would fit inside with out moving, two flats were filed on its edges so it would fit inside the adjuster slot.
The adjuster bush inside the beam that holds the springs plates in the centre was slid to one side and the plate held with pliers in the hole was attached to the m10 threaded bar. A few blocks of wood held over the trailing arm and the arm was would out with out to much trouble.
Here's the plate attached to the end of the arm once it was removed, the pin from a dent puller was welded on the end of the threaded bar to help guide the two together when trying to thread them inside the beam. This plate is now just lying around the garage so if you need it to let me know.
With all the trailing arms removed I decided to measure the bearing surfaces before installing them this time. There was about 0.002"- 0.004" interference between the bearing inner surface and the arms. 
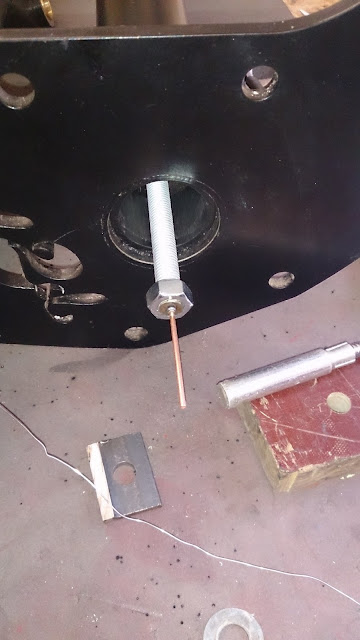
Now to pull all the bearings back out to there correct position I used a plate cut narrow enough to fit through the bearing with a hole big enough for 10m threaded bar to fit through once vertical the 4 corners would pull on the bearing inner face.
I used the pin welded on the end again to help attach a nut I also tried using a magnet to hold the plate in the correct position inside and passing the threaded bar in the opposite end with a nut attached to hold the plate.
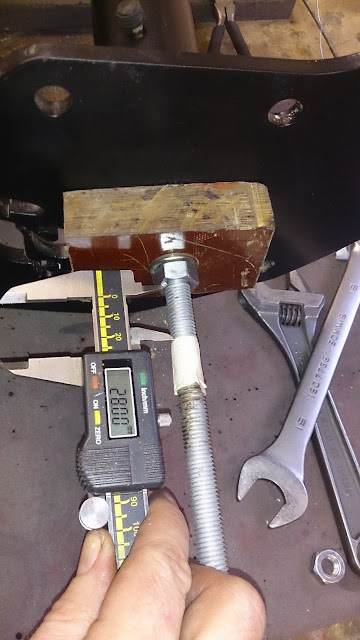
A block of wood and second nut was tightened on to the threaded bar, then using some tape and a measuring tool I screwed down the thread to pull the bar out the desired distance and move the bush back to there correct positions.
 The next task was to cut the bearings to size, I didn't want to do this gashly, so a post on the ssvc forum and help arrived from VW Jim in the shape of an adjustable reamer.
 
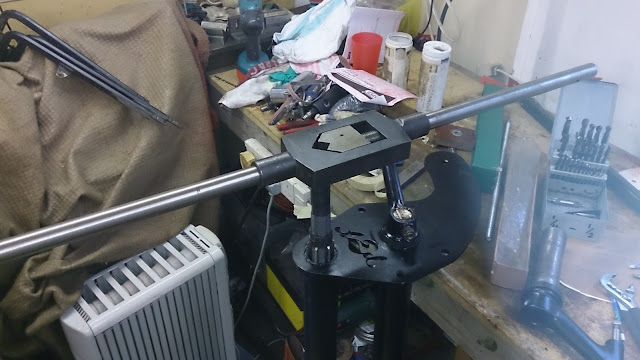
Although the size is pretty big this is a hand reamer, It took a bit of adjusting to get it to sit square so I could cut the bearings to the correct diameter, an interference fit of 0.000" - 0.001"  


Another chat with some colleagues about how I was getting on with the van restoration lead to getting my hands on this tap holder for giants. This was cumbersome to use as I'm not a giant, but made it easier holding the reamer square. 
 
 
With the bushes reamed and the trailing arms fitted I finally have a front beam ready to install.

Paint Prep for Roof

 
With the van on its side I thought rubbing down and preparing to roof for paint would be a simple job, maybe half a day in the garage, a bit of sweat and a coat of primer and ill be onto the next job. I was very wrong.
 
 
I started by filing the obvious scratches small dents and patches of pitting left from rust removal at the chemical dippers. I thought sanding these back with a small flat rubbing block would be enough. 
 
I had to break the shrinking disc out to try and reduce the crease of this dent. I didn't manage to get its back to how it should be but reduced it enough so it would not come through each time I sanded the filler around it.
 
 
With a day spent in the garage, I managed to flat back the etch primer with 320 grit and filled and sanded the many tiny dents that kept popping up,  these mostly appeared across where the inner roof braces and air box attached, probably from manufacture.
 
 
I had just enough time to put a quick coat of high build primer on before I got called in for tea, and the noise of the compressor would hack the neighbours off. This was not as easy as I thought, the old spray gun I decided to dust off and use was spraying out paint  intermittently and not at all if I tried adjusting the spray fan, but managed a ruff result. 
 
The next morning ( you can tell from the sun in the door way) a spray of guide coat and I was ready to get sanding and cutting back, This time I used an air sander with the 400 grit.
So this then revealed many more small pin holes and bents some I thought would have been covered by the primer and others I had not noticed.
A second coat of Primer, I was using up my 5 litres on just the roof. This time I tried using the gravity gun I used for the under side, I was still having trouble, I needed to turn the pressure right up just to get a spray, this caused the primer to be very orange peal, I figured I needed to sand it any way so I struggled coating the hole roof, I later found out that I needed a 1.5mm - 1.8mm minimum diameter nozzle on the spray gun. I was using a 1.4mm. I now know what that sign means on the side of the paint tin.
 
Morning of day 3 and I decide to break out the sanding block kit I got from ebay. This is what I should have started with in the beginning, I began with 600 grit but this took sooo long to cut back, possibly not helped by the terrible application the night before. The long block also showed up the gradual dips in the paint that I should have been able to sort out at the beginning.
 
By the beginning of the afternoon I'd managed to cut back for a third time the primer to the smoothness of a billiard ball, But I wasn't able to raise my arms to eat any lunch, should look like pop eye in the morning.
So with a few lessons learnt in spraying and cutting back primer I dragged the van out and with some neighbourly help rolled it back on its belly, Then fitted the front and rear wheels to get it rolling again, even though its just back in the garage again.

Lead Filling Body Soldering

I got a body soldering kit from Frosts and had a go at filling the B pillar seam and one of the rear gutter joints, Ill add more description when I get the chance.


Rear Hatch Repairs

There were two areas around rear hatch that needed final attention, the lower corner was made of three panels all joined at one point.


Also the top corner under the hinge that was a bit of a surprise.


First I dealt with the lower corner, with the van on its side It was easier to work on at this height.To get access to the repair area I started buy cutting away the top lip that was good metal.
I then cut the jagged metal out very carefully then made the inner skin and and tacked that in place.
The outer part was made with a small lip to join to the rear corner panel.The top lip was then welded back onto the top of the corner part.

I also pulled the dent out just below the repair.


I then moved onto the top corner,  with the stop plate and bad material cut way I cut up my cereal packet to get a patten. With the repair patch folded to match both inner and out bends I had to weld a bend pulling pin onto it so I had some way of holding the patch before welding.

With a lot of carefully welding and grinding the patch was in and the stop plate refitted.


A few pin holes in the roof needed patching up as well. This ment I had to re apply some of the seam seal in the gutter aga