Capping the bottom of the A pillars


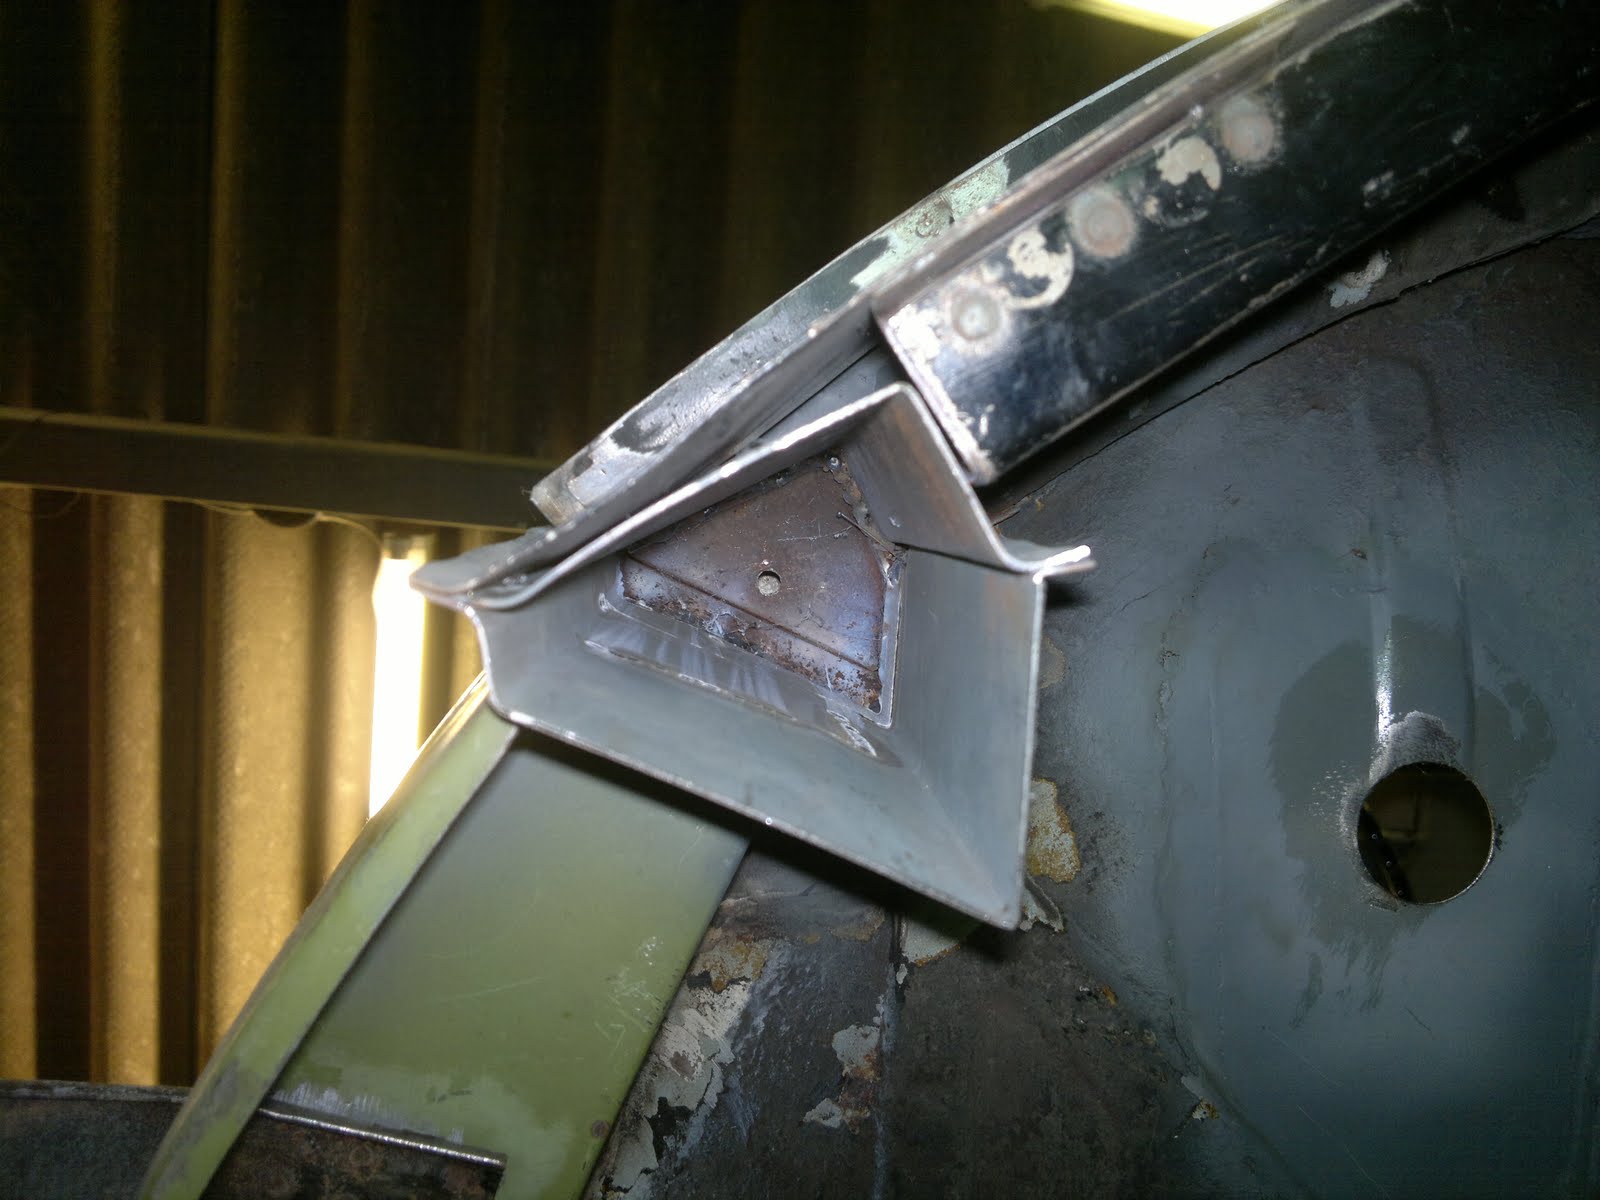
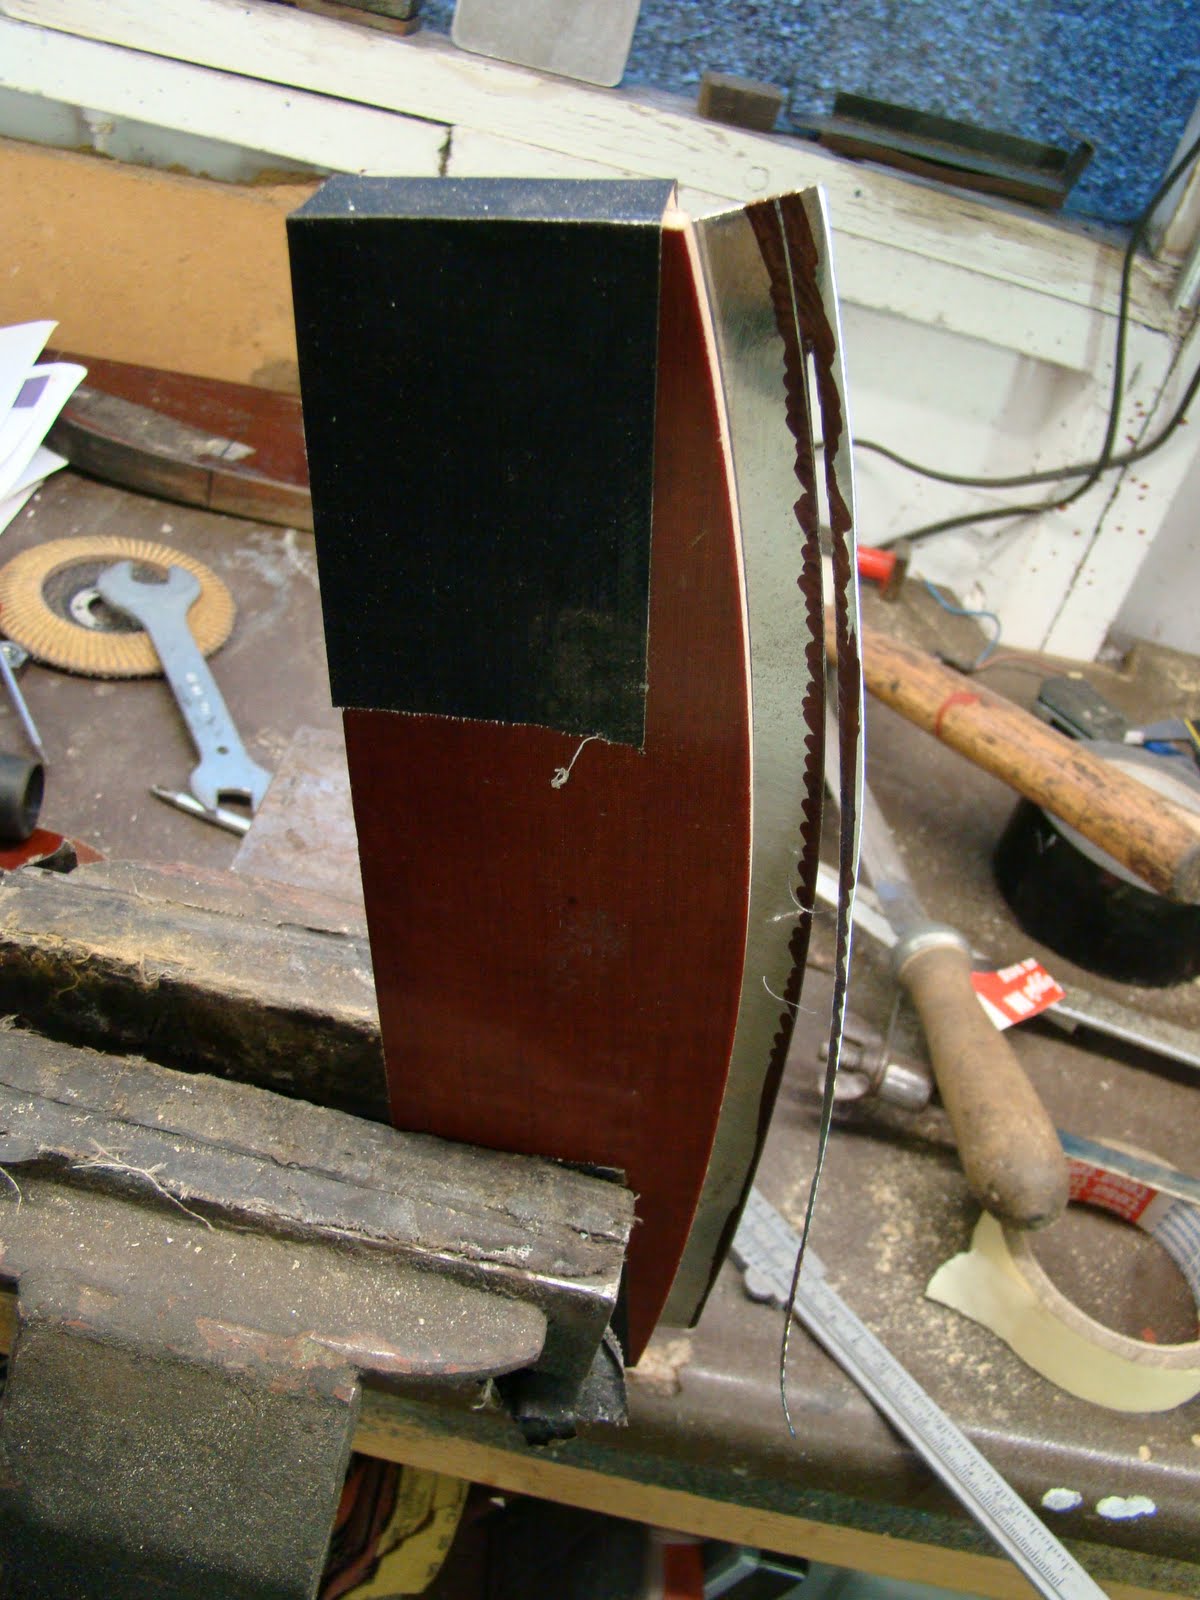
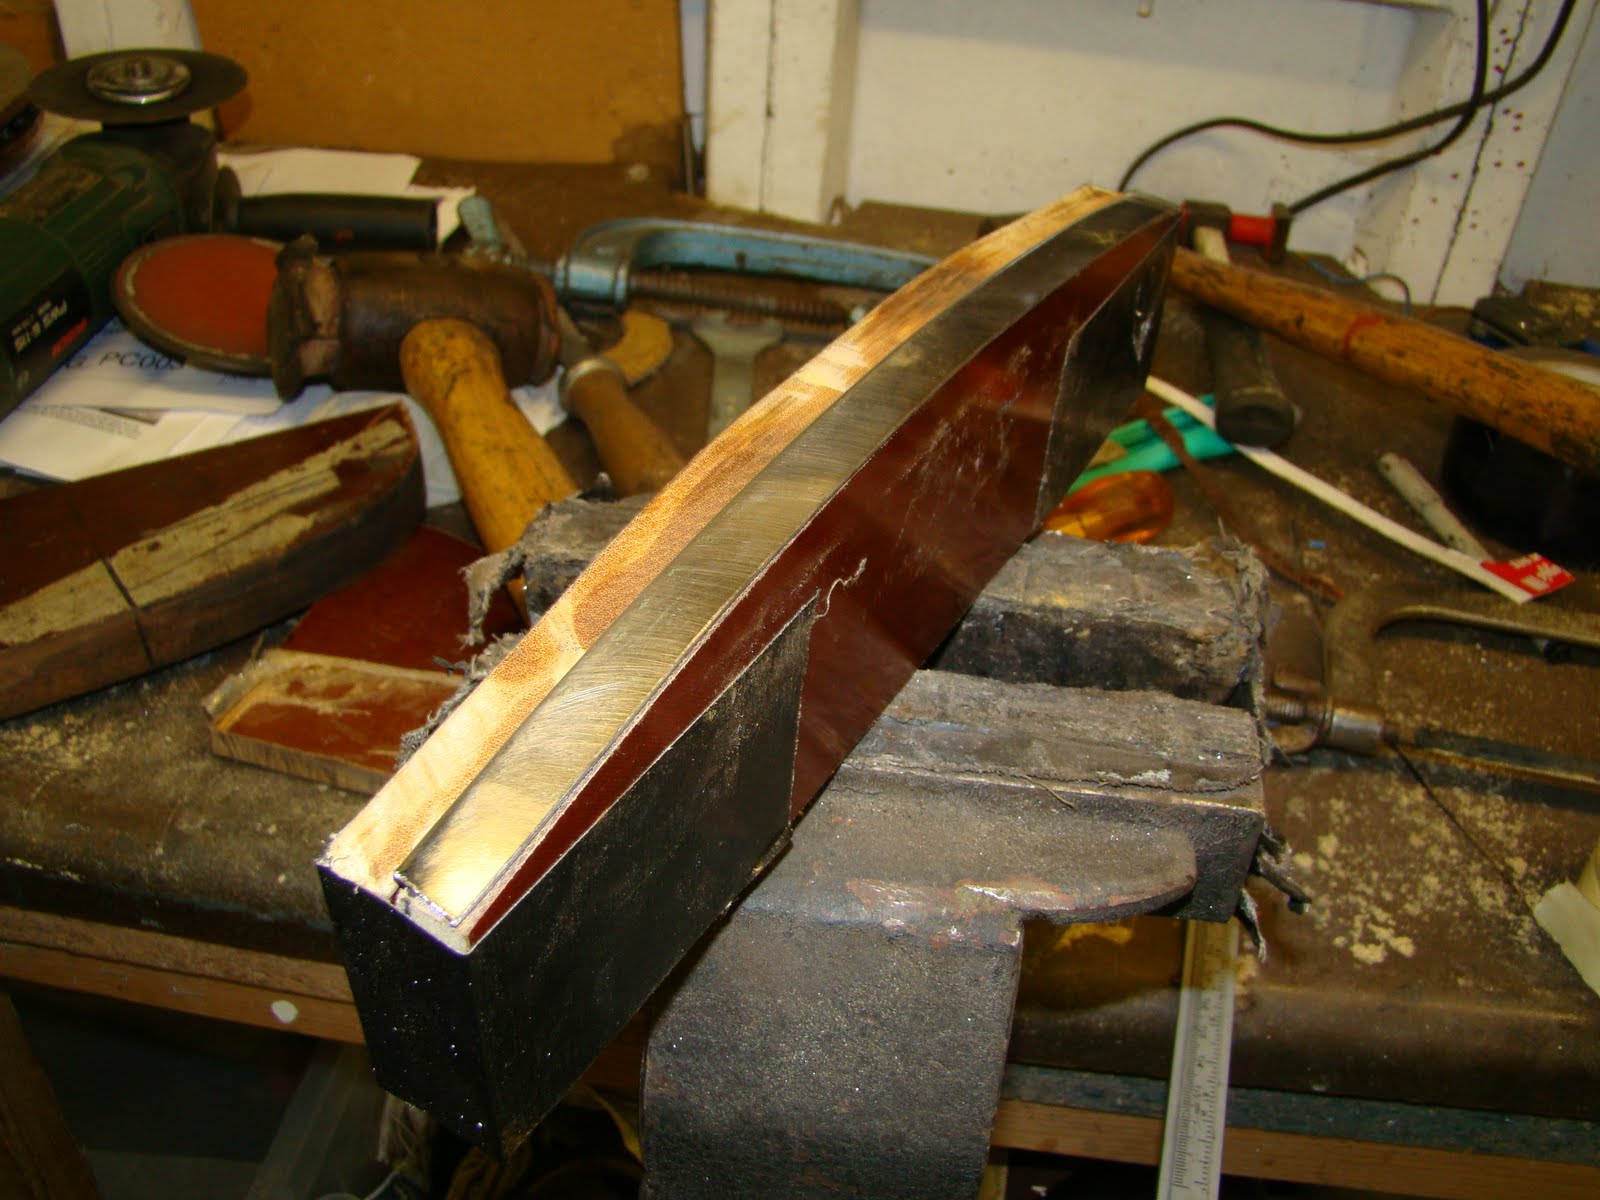
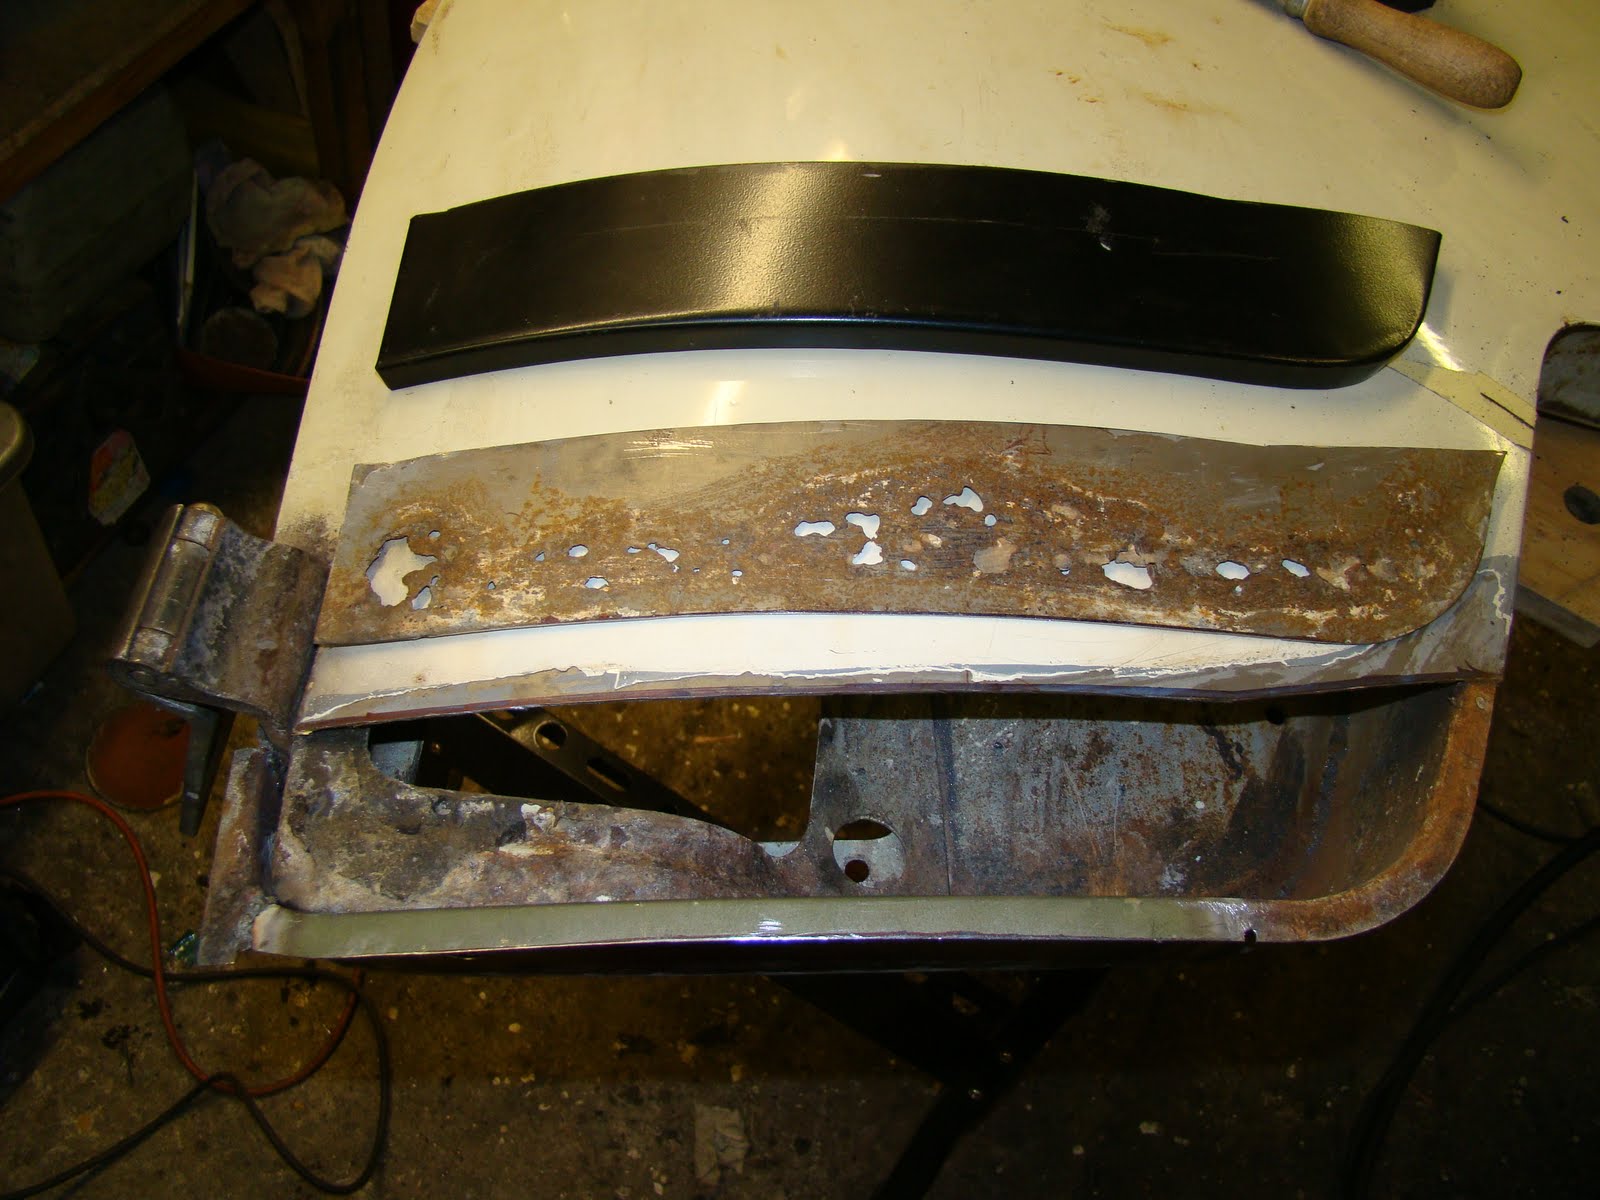
I needed to cap the end of the A pillars but the plates provided with the repair section I got were no way near the same shape as the bottom of my pillars so I decided to make my own.

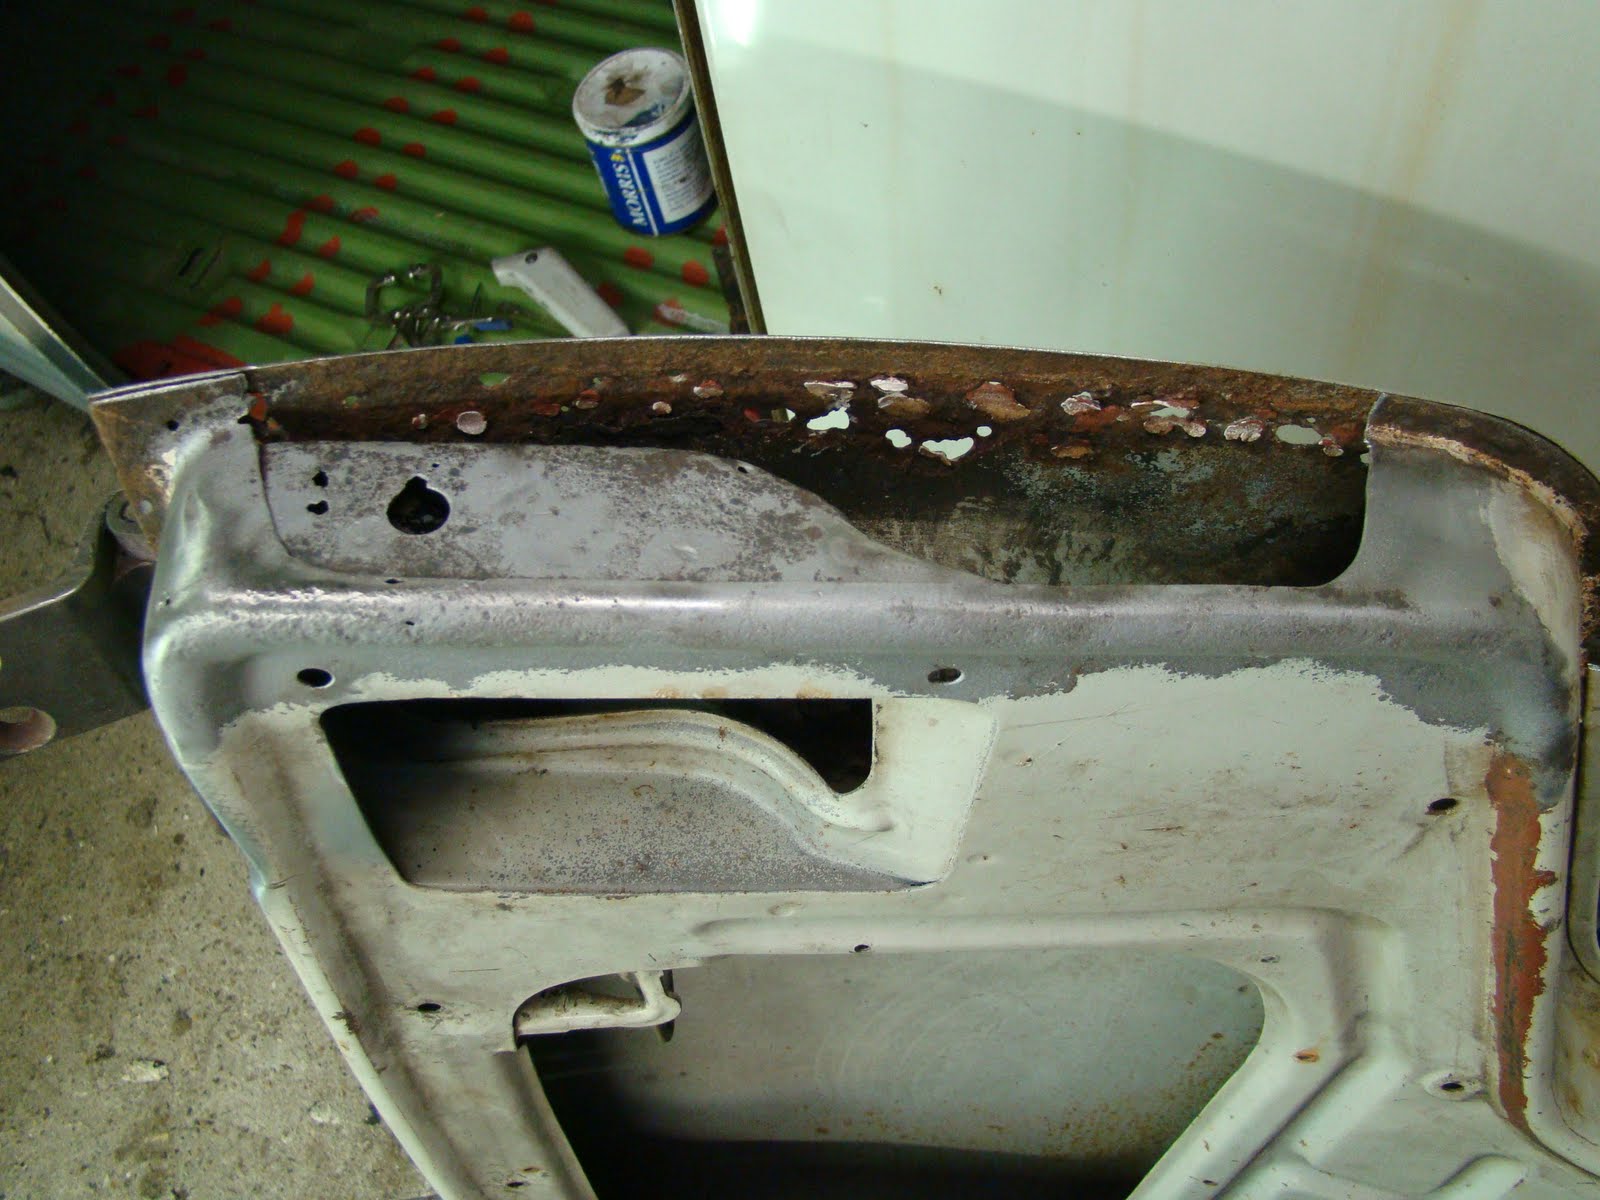
With a long series drill bit I put a hole in the top of the boxed section of the A pillar. Not sure if this is good for the corrosion to stop moisture build up or bad for it because it will let moisture in? 
Hopefully a good squirt of corrosion inhibitor once its complete should keep it rust free for a while. 
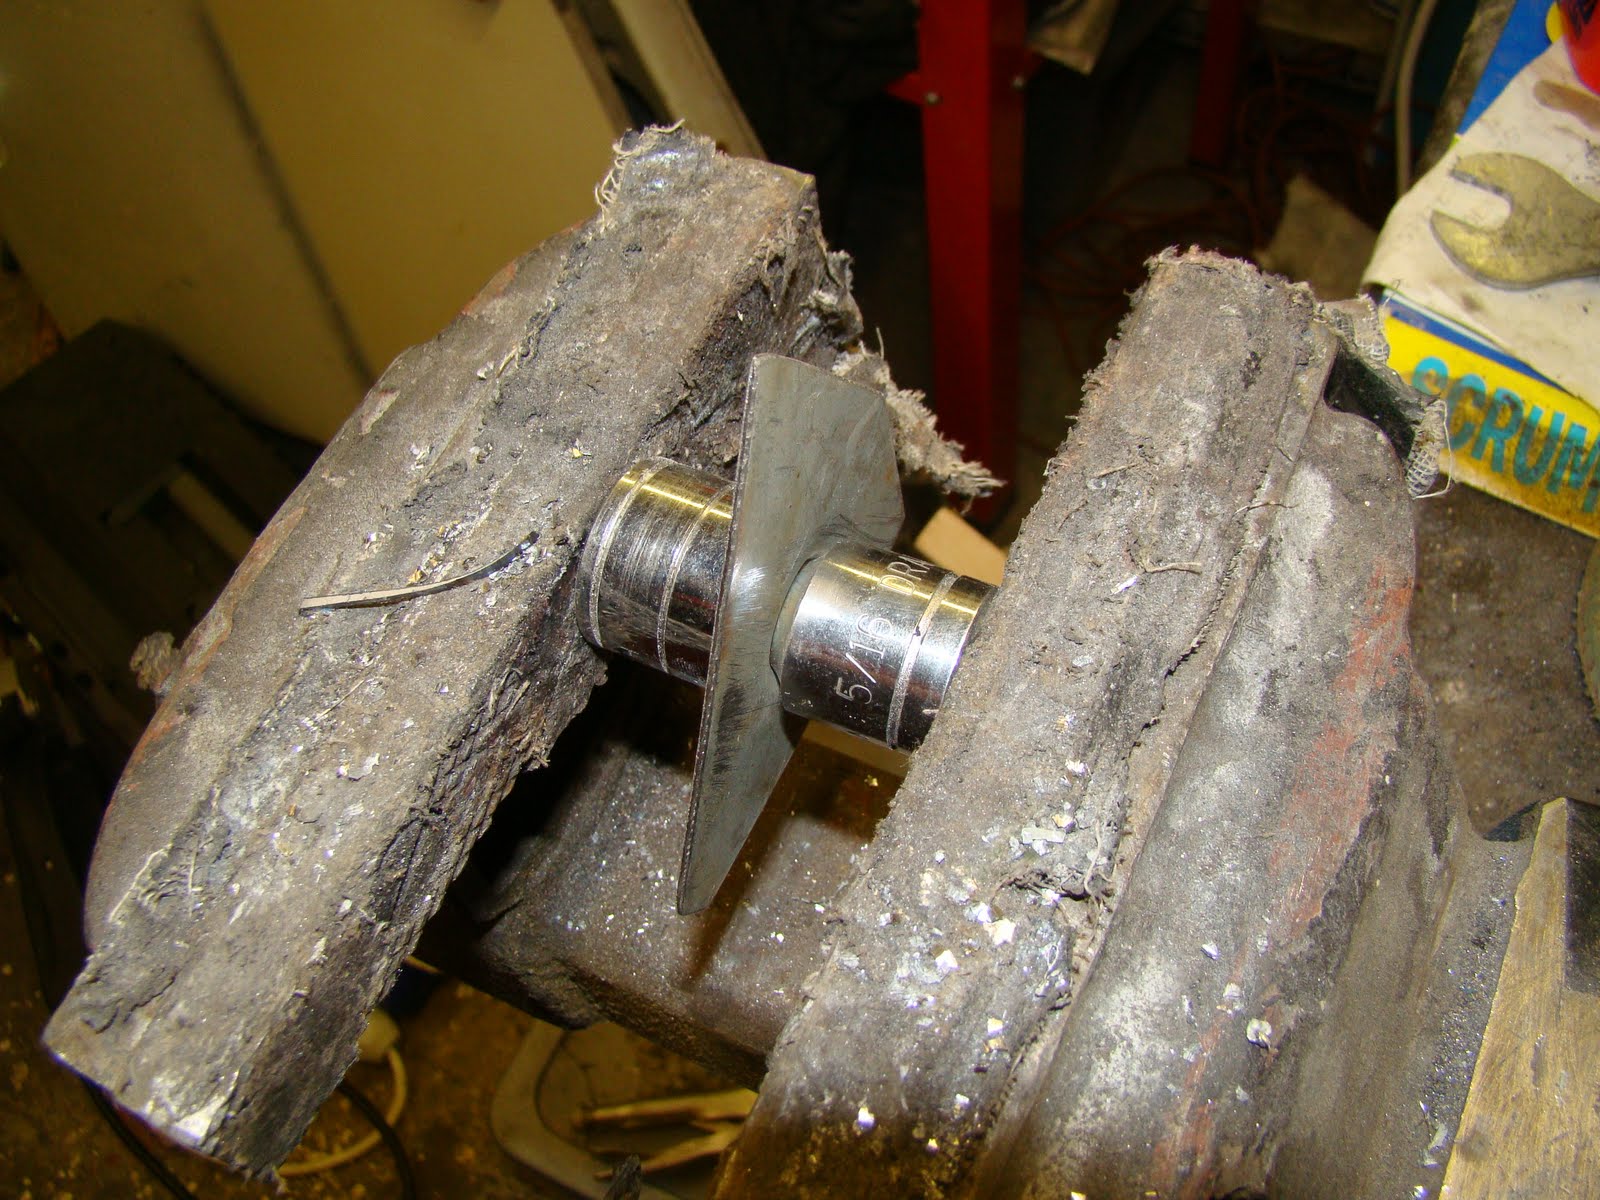
I wanted a drain hole in the bottom as well and managed to achieve this with a tapered hole cutter and then used a couple of sockets, one with a large radius on its shaft squeesed between the vice jaws, to get the flanged hole.
This is the patch once profiled and pressed with the two sockets I used to make the flange.

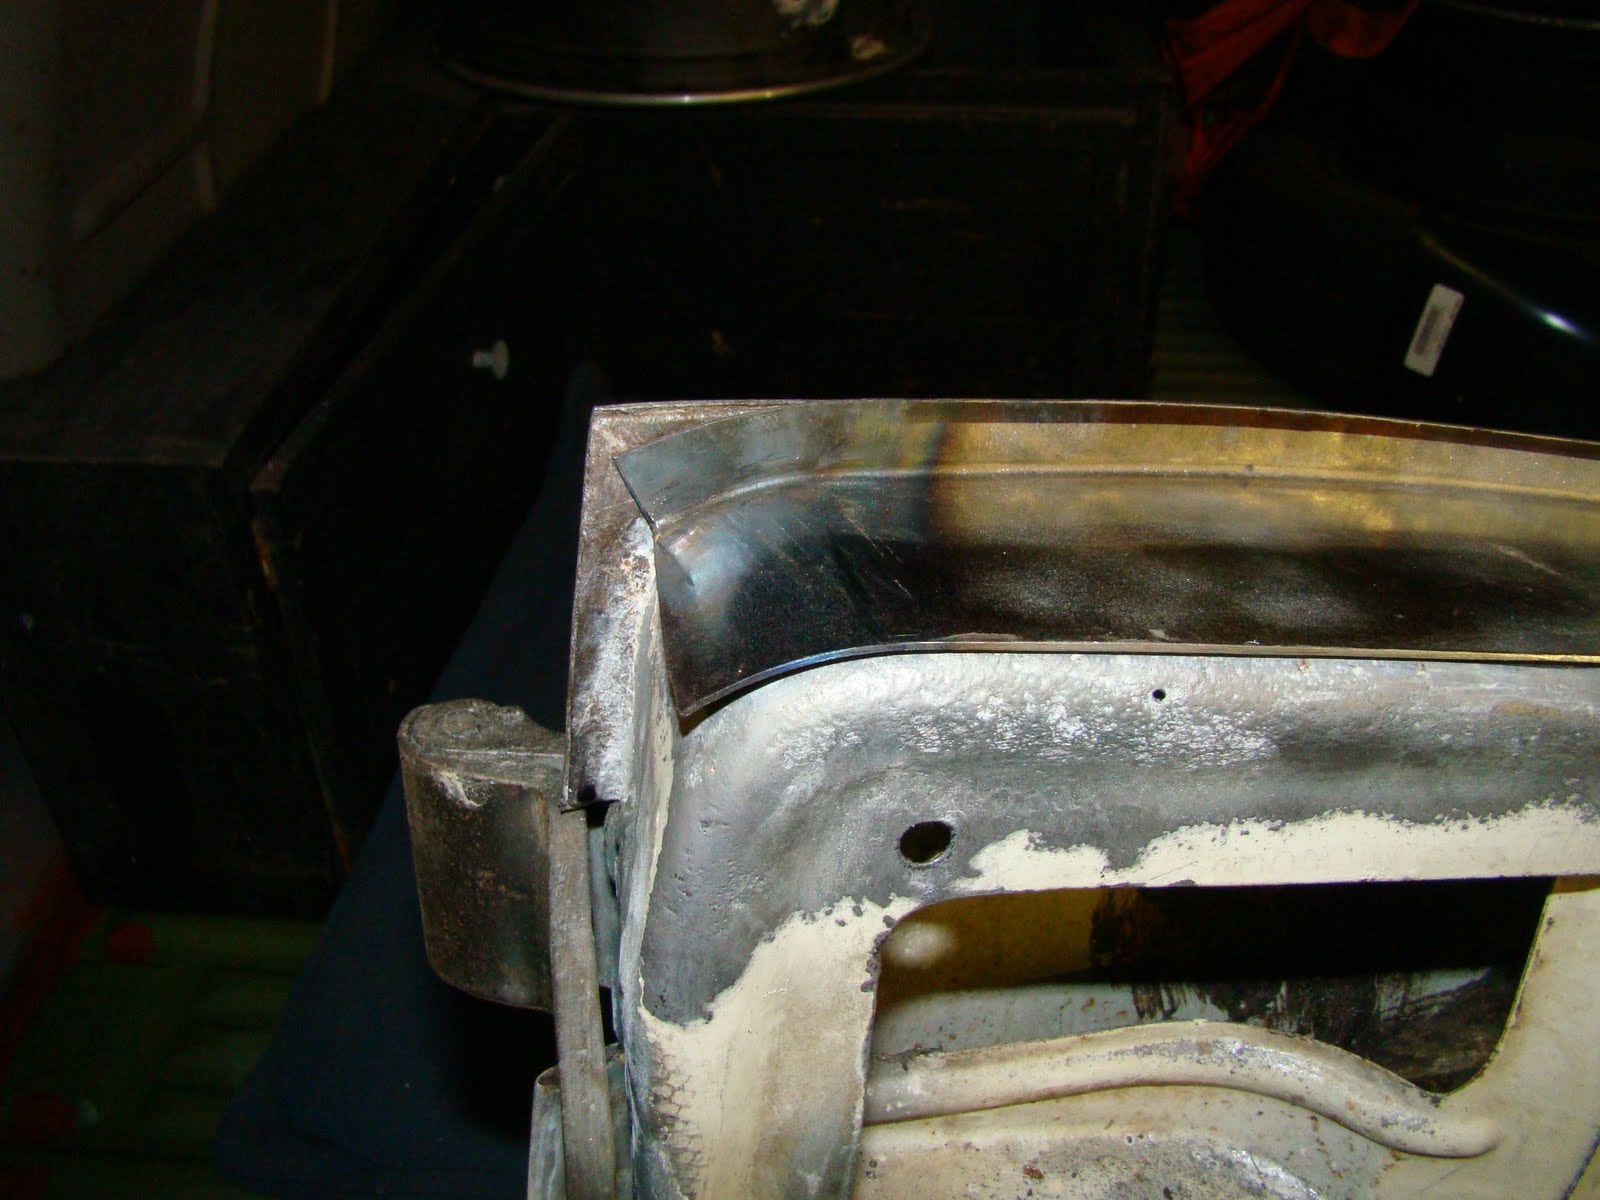
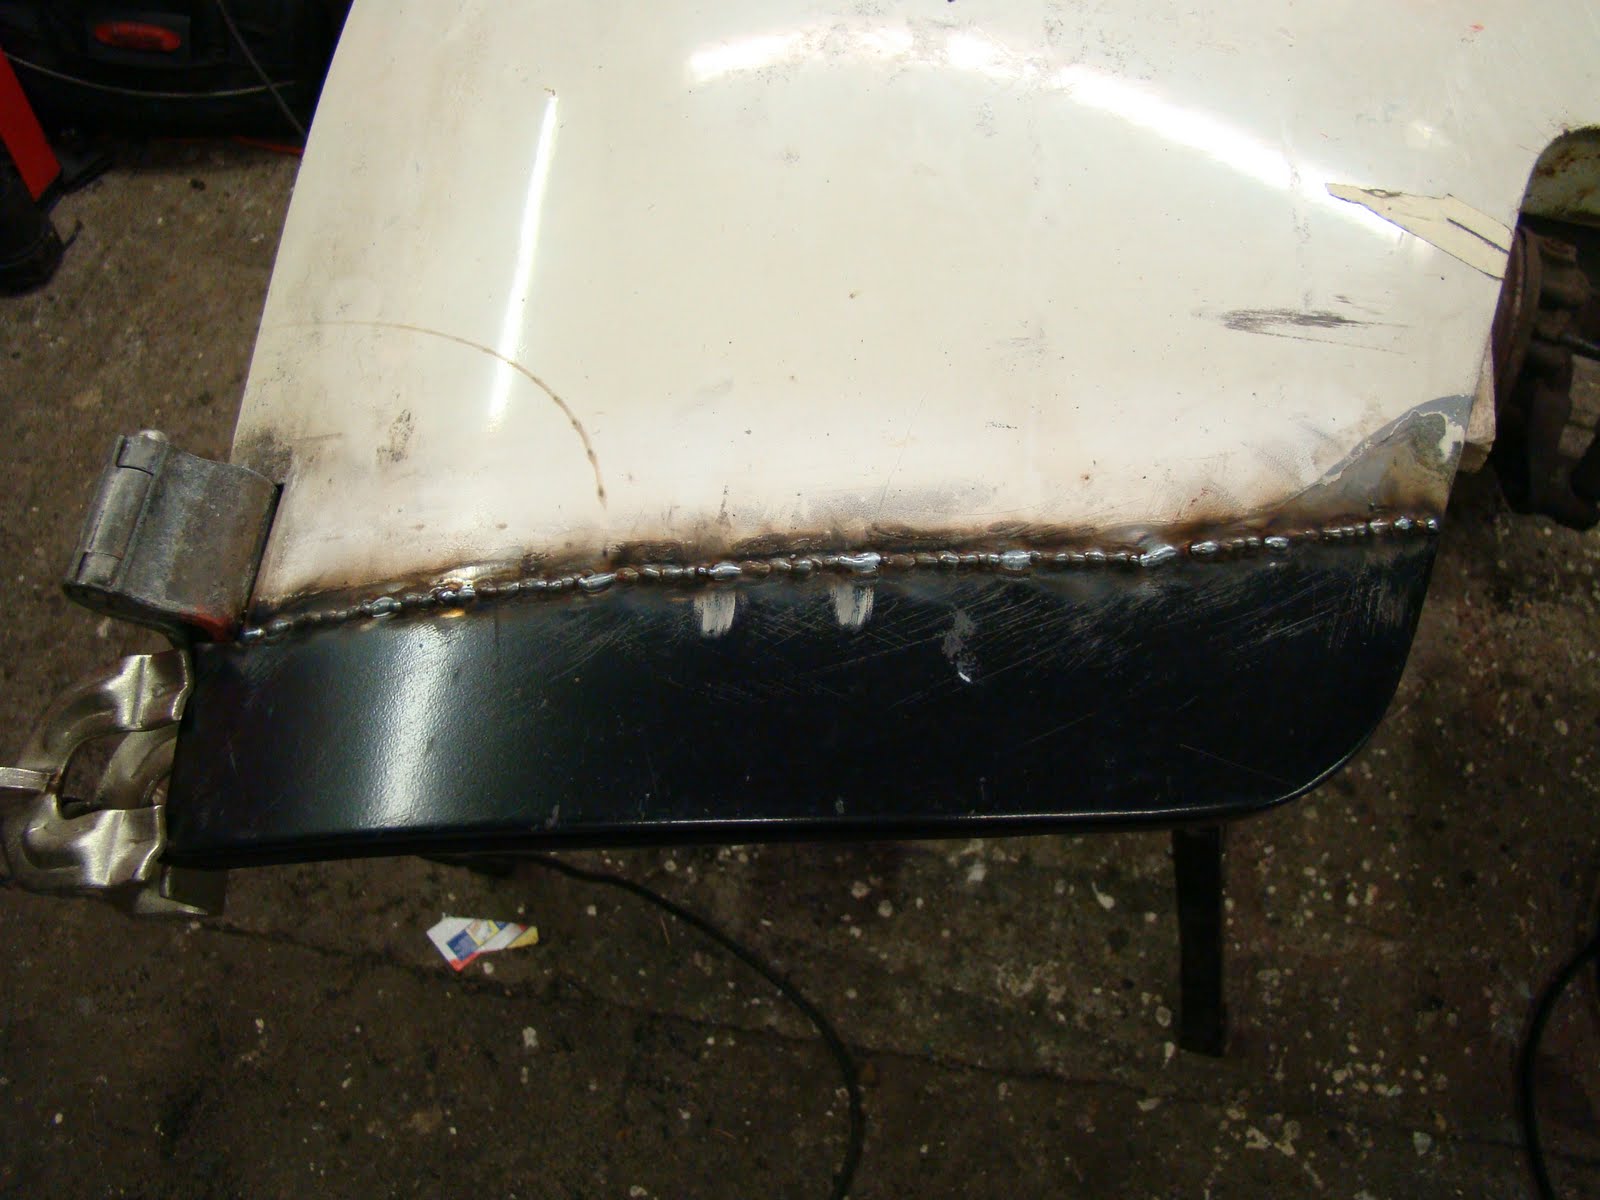
I then welded around the sides of the plate upside down with the welds dripping all over me. Then cleaned it up and later painted it. 
I then did the same for the other side, although the patches I repaired the A pillar with came down a little short so added a lip to this patch.
Then welded upside down again. Its not a happy place to be.

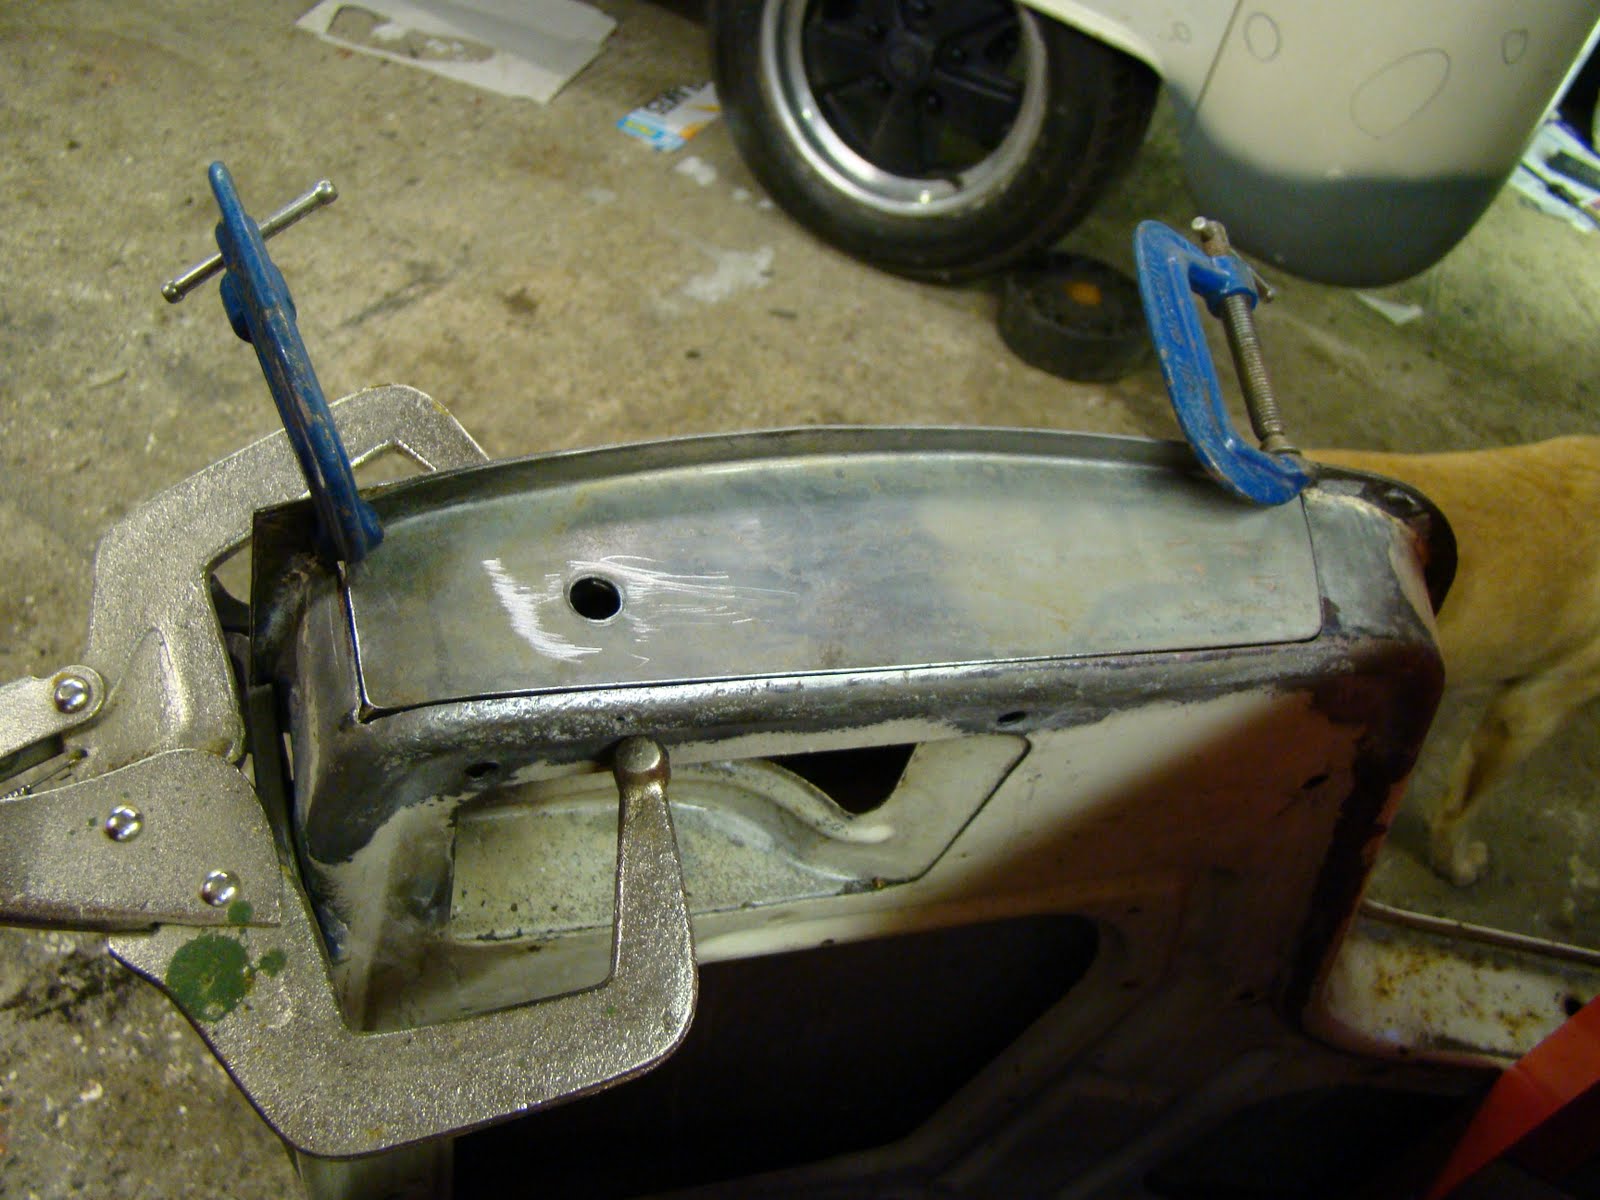
Finally painted it up once the welds were cleaned up, I'll cover the inside of this A pillar with corrosion treatment once I get the van painted and seam sealed but look, my arm hair and the paint are the same colour.


Cab Floor Patch Repair

This is a bit of a rust hole (to the right of the massive round meant to be there hole) I'd kept forgetting about it as it was tucked away under all the crap I kept storing in the cab floor.

 
 With the confidence now to get this patched up in a couple of hours I excavated it and cleaned it up.


To make the recess in the repair piece I measured  the width and depth of the step and got some steel plate that was thick enough to give me the same  depth and width and then positioned a couple of other straight edges to get the correct gap from the inner piece too. I made sure the edges were burr free so I got a clean joggle.
I tried to squeeze the whole lot together in the vice, but only got a shallow bent on the joggle. I don't have a fly press handy, so beat it with the biggest hammer I could find in the garage. It turned out ok although a little shocked.

With the patch trimmed to fit and a decent coat of weld through primer, I clamped it in place with the biggest G clamp I could find.
Quick splert around the edge of the patch with a mig weld

A clean up with the angle grinder that's starting to sound a bit rough, hope it holds out a little bit longer.
Then a quick spray with the Airfix paint I had left from the Battle of Brighton set I got for Christmas

Panel Shrinking Video


These videos are the same, just the one above is flash player.
This is my first video for the blog, Just thought Id try this as it's easier to explane what I tried to do with the media of moving pictures.Its also make an easier life for my blog editor so he doesent get to frustrated with my appauling spelling and grammer. Un fortunatly you get to listen to my monotone voice.


Dusting off the van

Dragged the van out to tidy all the rust and filler off the garage floor, thought I'd post a few pictures of the van, rather than close ups of welded panels and rusty holes for once.

It is so close to being solid again, just a few small jobs to do before dipping and paint prep. This may be a little further away than I thought as I spent my paint fund on an engagement ring.........

Guess a wedding gives me a goal to get the van finished by.

IRS Gear Box Nose Cone

I dragged my IRS gearbox out of the shed, I think I got this from a late squareback for £60 from Just Kampers when JK was a small work shop.
I pulled off the nose cones to swap
I struggled to get the CV joints undone, probably because I first tried to get an allen key bit into the rusted bolt head but then worked out I needed to buy a set of torque bits that fit better (or correctly!). Then needed a lot of welly and scaffold bar to get them to undo. Luckily I didnt shear any off.
Pulling the selector rods out of the nose cones I noticed one was bent, never seen this before.

Cab Door Bottom Repair

This is a more a picture than word post on how I repaired my cab door bottom. The rust has been hidden under a layer of filler and rattle can primer, and has kept well since I first covered it up 20 years ago.

Here's the repair patch lined up on the outer skin of the door. And the rust hole that I didn't notice until the door was off.

Before I could patch the outer skin I needed to do something about the big hole. I carefully ground the folded lip off the bottom of the door skin.
 
With a cardboard template I cut a bending block out off hard wood lamite block.
 
Then cut a 15mm lip to bend over the block for the patch.
Then hit it a lot
I cut and chain drilled the rusted skin out tidying the edges with a die grinder.
Then stuck it in my sand blaster, there was a little leak of blasting dust as I couldn't quite get the door fully closed.

I treated the rest of the pitting with the rust blast treatment and a wire wheel.

 
Before I cut the patch to size I stretched the end to fit the profile of the corner curve,

I didn't leave enough material to fill the whole of the lip but figured it is going to be well tucked away and forgotten about.
Satisfied with the curve I treated the metal, punched the drain hole back in place then trimmed the patch to fit the hole.
Welded it in and cleaned it up just like that, (actually 3 day work and two patch attempts)


Once the inner skin was repaired I could cut away the outer, to reveal more rust.
Back into the sand blaster and another treatment of rust blast.
Any holes were plugged and cleaned up.
Applied a decent coat of rose blush lip stick.
Then tried out my new over priced panel clamps that get stuck in the gaps if the metal warps from the heat of a tack weld. Another tool I should have brought at the start of the restoration.

A tack weld, or two


Then a lot more tack welds, Still finding it hard to stay patient enough between welds to keep the panel cool.

I had to trim the lip a little so it did not foul once bent over.
I took the door to collage and panel beat the dents and warps out, using the skin File to find the high and low spots.
Then primed and back on the van job done. Next...

Rust Blast Treatment

Here is a few photos from using a rust treatment called Rust Blast from KBS Coatings, they had a stall at Volks World so thought I'd give it a try.
I started using the brush on liquid while I was fitting the rear arch panel. This part of the panel that needed treatment had been left bare metal for about 10 years while the van sat in the garage.
The instructions states you need to keep the metal wet for 20 minuts for light rust and 40 for heavy rust, this wasen't the case for me, It took a good few hours to get the lighter rust off with out any abrasion, probably something I could do quicker with a grinder and wire wheel.
Eventually the panel started to show some progress but with a lot of help from some scotch brite pad.
The results do look good but just take four times as long as it said on the tin. The Rust Blast is ment to leave a zink layer which gives it a grayish tinge.
The last bits of rust left were the pitted arears, when you apply the Rust Blast the corrosion in the pits turn a darker coulor and show up so making it easiery to see whats rust is left. These final bits I removed with a whire wheel, this dug deep into the pitted areas untill the material was shining and rust free.