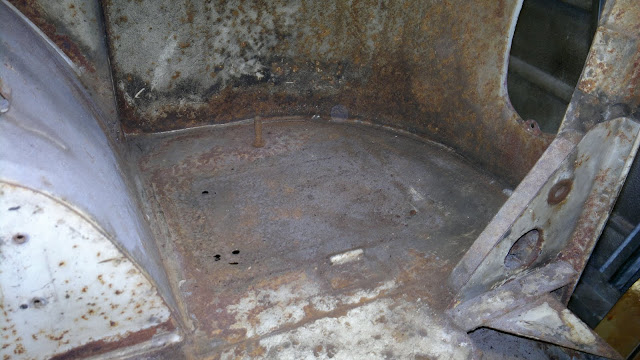
My battery tray had been ignored until I started messing around at the rear end and started removing the layers of flaking rust I found sitting back there. I thought about patching the holes but for the sake of £25 I'd replace the panel.
After a trip to Bug Jam I picked up a Creative Engineering replacement panel and started hacking the old battery tray out. Starting with a cutting disk close to the edge.
I then peeled away the spot welded edge and butchered the corner of the battery tray out with a pair of pliers, the way the Pros do it I'm told.
Cleaned up the underseal to discover the corrosion, the wobbly marker pen around the edge of the rust and holes gives you a better picture of the corrosion that needs removing.
I cut away the marked out area and drilled off the spot welds on the corner fold to assess the rust underneath and cleaned away any lifted paint on the outside of the corner panel. I think I'm quite lucky with how little corrosion there is to my corners, although sometimes its easier to replace a whole panel than spend time patching up holes.
 |
A bargain Cosco sandblaster was used to clear out the pitting under the lip and to cover me and the rest of the garage in sand and grit. |
After reassessing the pitting to the outer skin of the corner panel I decided to just get rid of all the corrosion inside and out.
The awkward part of this panel is that the battery tray panel is sandwiched between the rear wheel tub and the lower splash panel
So with some delicate work with a drill I removed the spot welds on the splash panel and the battery tray lip that was fitted between the two, and tried to keep the wheel tub in as good condition as I could.
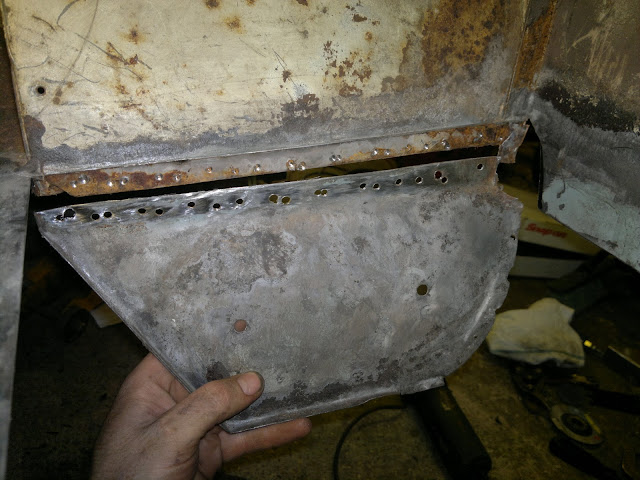
With the splash panel removed I stuck it in the sand blaster for a clean up, then welded up the spot weld holes. You may be able to see a strip of copper I used to stop the weld penetrating too far through the panel and also as a heat sink.
I replaced the corner that I left attached to the van when I ripped the panel out, using a piece I joggled and bent to fit.
A few hours' work and the splash panel is ready to fit back in.
I then had the task of patching the double curved lower corner panel. This repair piece is cut from a cheap patch panel although it did not fit very well in its original shape I was able to position the panel to cut out a profile that closely matched what I needed for my repair patch.
A few tacks to ensure I kept the correct curve
I then very gingerly tacked the rest of the panel on. I ground off any welds that didn't penetrate enough and used a strong light behind the panel to find any gaps I'd missed once I had ground the welds flush. My method of taking it slowly to keep the panel from distorting was to only weld where the panel had cooled enough to touch, yes just like that bit in Men In Black.
So a trial fit of the new battery tray panel from Creative Engineering didn't look too bad. The orange stuff on the panel is corrosion inhibitor not Hot Wing juice by the way. It can take me a while to get round to some jobs so best to keep the panels as fresh as possible.
The curved profile wasn't an exact match with about a 2-4 mm gap at either end, so I marked the contact points and beat the lip out on the edges and in on the crown of the curve, this didn't get it perfect but enough to get a better fit for panel beating later.
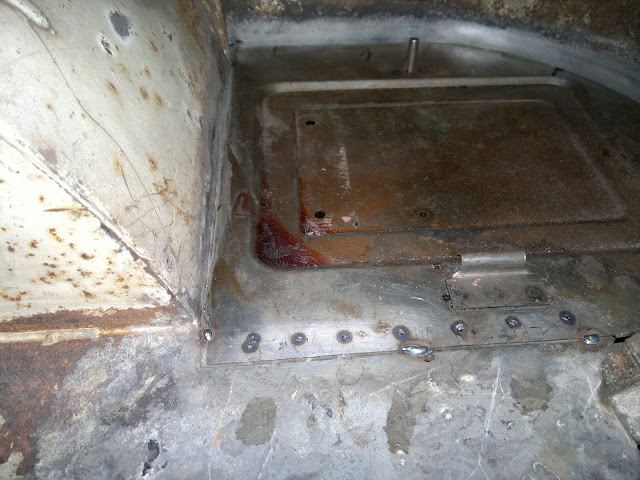
With a bit more messing around I finally got the panel in a position I was happy with. I used the joggled edge of the engine bay valance panel as my datum point for the corner of battery tray, (lower edge of picture) clamped the panel tight, then tacked the edge ready for a few spot welds.
I then attempted to slide the splash panel back up between the two panels and spot weld the three panels together. It went a bit wrong. I realise now that I'd painted the edge of the panel with weld through primer and this didn't work well with the spot welder. I managed to get a couple of strong spot welds but the rest of the panel was MiG welded at the edges and where I burnt through the panel with the spot welder.


