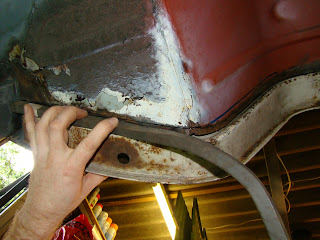
 With the disasters I've had before with the front wheel arches this was the job I've been looking forward to the least (that's probably why it's one of the last big repairs to do). Having scrapped the idea of using the Schofield arches because of the lip running along the top of the arch, and the fact that I had totally cocked the panels up by warping them with my first attempt at welding(see previous wheel arch post), I'd been hunting for alternative arches ever since.
 1
1
1
 I spent a whole day trial fitting, clamping, marking, cutting, getting frustrated, swearing, eating leftovers, clamping and trial fitting again, and finally at the end of the day just so that I had some thing to show for the hours spent in the garage I spot welded the two skins together. I fitted the arch up to the van one last time before retiring and found the outer skin was nowhere near lined up to the curve of the outer skin. I nearly cut the arch up with the grinder.
1
I spent a whole day trial fitting, clamping, marking, cutting, getting frustrated, swearing, eating leftovers, clamping and trial fitting again, and finally at the end of the day just so that I had some thing to show for the hours spent in the garage I spot welded the two skins together. I fitted the arch up to the van one last time before retiring and found the outer skin was nowhere near lined up to the curve of the outer skin. I nearly cut the arch up with the grinder.
11
1

 After comparing the new and the old arches I noticed the newer arch at its worst point was 8mm thinner than the original one that I still kept for sentimental reasons. The missing 8mm is just under the thickness of a cab door seal. This meant to fit the arch flush with the cab door skin I'd have to fit the arch fouling on the inner door with no gap for the seal at the lower edge. Or undo a days' work and separate the two skins and start again. This was a good excuse to finally buy a spot weld drill to help undo all the spot welds I'd be cocking up.
1
 A few weeks later with some fresh sleep and lots of jaffa cakes and sugary drinks nearby I officially started my 3rd attempt at fitting these arches. I decided to start again by marking out a line on the inside of the arch where the inner face of the lower door seal should be when the door is closed. I then positioned and clamped the inner skin, then tack welded the skin to the inside of the arch. This allowed me to keep opening and closing the door while trialing the outer skin, without any clamps or vice grips getting in the way.
 A few weeks later with some fresh sleep and lots of jaffa cakes and sugary drinks nearby I officially started my 3rd attempt at fitting these arches. I decided to start again by marking out a line on the inside of the arch where the inner face of the lower door seal should be when the door is closed. I then positioned and clamped the inner skin, then tack welded the skin to the inside of the arch. This allowed me to keep opening and closing the door while trialing the outer skin, without any clamps or vice grips getting in the way.
1
1
1
 With the top and middle edge tacked and the bends tight into their radius, I found that the lower edge was pulling away from the lower step. I'm not sure if this is from the panel fabrication or because of any warping of the bus when it had been moved, or worked on without the support of the arch there? This problum was solved with the use of an axle stand and 2 ton trolley jack to push it in to place. This also helped with the profile of the outer skin.
 1
1
1
1
1
 I was expecting to have to add strips of material to both skins to get the thickness of the arch but found with a bit of trial and error I managed to get the inner skin into a position where the outer skin would sit flush onto it, and with a decent curve that would match the shape of the cab door skin. This did mean grinding and re tacking the position of the inner arch skin a few times, this also means the door seal carriage will not be too small to hold a seal.
1
1
1


Now a bit happier with the situation, I spot welded the inner skin into position, starting at the top edge and working down. What I should have done was weld the radius and middle edge first, then the top and bottom. I ended up with a small gap between the skins, this popped apart when I removed the clamps after welding. A bit of heat and a persuasive hammer sorted this out. I also cut away a couple of strips about 6mm on the upper edge of the seal carrier where it touched the door. This also gave that part of the arch a flush edge to match along the inside of the door.
I'll attempt the outer skin another day.


