Painting the Cargo Bay

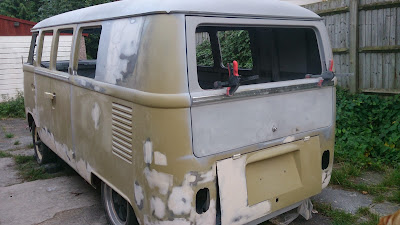
Its been a long time coming, but finally the day the van gets shipped off to the paint shop arrived. Not quite as ready as I'd hoped but if I kept putting it off the van would never have got to the painters.
I found the painter online while looking for a mobile booth or spray booth to hire, I came across "the paint shop pros" and checked out there website and face book page. www.thepaintshoppros.co.uk/ After a chat on the phone I arranged a visit to there shop.
Gavin with a back ground in graphic design and his Dad Dennis with a wealth in body shop and paint experience were a great match for my Van

When the van arrived I planned to paint the interior my self, Gavin allowed me to use his shop to finish the final prep of the cargo area with the help from Rachel.

The sanding and final prep took a couple of 9-5 days with two of us, It did get a bit tedious but well worth the hard work.

The windows were taped up and the van rolled into the booth. I later found I should have opened up the rear hatch to let the light in and stop the paint swirling around inside, I would have got better paint coverage on the rear seal carrier and rear hatch hinges.

One more wipe over and blow out with an air gun.

The rest of the van was covered up and I got suited up.

A couple of quick tips from Gavin.

Then setting the guns paint flow fan size and air pressure.

With a full pot of paint I started on the roof, making sure my dirty feet didn't get the floor dirty, My knees did take a pounding on the corrugated floor.
I used a small paint gun to spray into all the corners and spray the under side of the panel supports

I then worked along the long side, the rear corned is where I had trouble with the spray cloud and the shadows

It took a couple of fill ups with paint, forgetting to wear my hood I had paint in my fringe for a couple of months. The bulkhead was the last to get a coat before the floor.


The paper was taken off once it had cooked for about 20 min to reveal the results.

Fitting Delux Belt Line Trim

With just a coupe of days left to prep the van before its booked for paint I decided its probably more important to drill off the belt line trim than get the rest of the body prep done that the paint shop will be going over anyway.

With some help from a mate We spent the day fitting the doors and rear hatch and aligning the gaps and getting the swage line straight before starting on the trim.


I then raided my new parts stash locked in the spare bedroom and dragged out the belt line trim. This is from VW Heritage which I think is produced in the far east, the quality is not to bad comes with all the parts and it has the screw holes already countersunk unlike some other kits I've seen.


I tried to look on line for a how to but didn't find any thing that helped, there was a article in volks world magazine but I'm yet to find out which date. We decided to start at the cargo doors as this is where the most variation would be.

Using a measurement from the gutter for squareness and eyeing up down the side of the van to position the height so the flat face of the trim looked equal to the curve of the out side of the van, this positioned the trim proportionally lower on the swage line.

Once we were happy with the position of the first piece of trim I punched the centre of the first hole. I used a 2.7mm drill. As the bit started to cut I checked the position of the hole again and adjusted as required before it broke through the skin, making sure the drill chuck did not hit the trim as it broke through.

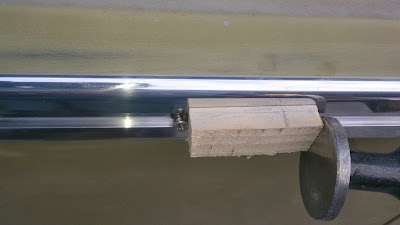
Due to the angle on the thread of the screw, as you screw it into place it tends to wander, if you let it continue the head of the screw will push the trim away from the centre of the hole, to counter act this as the screw was in a couple of turns I knocked the head back into centre.

I positioned the back piece next after doing the door using the measurements and the same technique as the cargo doors, the only problem I had was one of the end holes that also held the end caps was positioned over the seam of the doors inner skin so the screw would not go through.
To get the back corner pieces to fit I started by getting the curve on the rear corners to match with a bit of heat and bending over my rear bumper, this took a few attempts to get right.
With the corner now fitting the curve it now raised as it went around the corner, I twisted this out by holding one end in a work mate.

There was a small lift where the two pieces met but I was able to pull this down with the position of the screws.

Placing the door pieces was easier because they curved down and you just needed to position the back of the door in the correct position. the small piece between the doors shows the extent of the problem with the screws twisting, this was remedied by straitening the head of the screws with a block and hammer.

With the day light finally faded and the transport booked for the morning I had to leave the trim just fitted to the one side, tapped up to protect it.
Ill add the rest once its back from paint.

Final Body Prep and Primer

With the planned date for paint quickly approaching I needed to finish of the body prep
 As Ive used on the roof I dug out the huge pot of filler primer this was mixed 4:1 with the hardener and then about 15% thinners. I needed to use a 2mm nozzle in my spray gun to get a decent flow rate when spraying.
 I started with the bulk head as it was easy to get into the flow.
 Then the same evening managed to spray up the other side of the bulk head.
 I'm glad I filtered my paint before pouring into the gun there is only a few hairs and dried paint from the tin.
 once the primer had dried I used a light coat of guide coat to help flatining back
 The rear top quarters needed a coat of filler where the spot welds showed from the seat belt support bracket I welded inside So in a rush before dinner I mixed up a load and slapped it on.
 Knowing Id need a lot of rubbing down I returned the next day and found it was so soft I could scrape it off with a spatula. That will teach me not to rush things.
 I also came across a problem with my spray gun, the paint came out before the air, this left drips all over the place that needed rubbing back flat.  A spacer behind the trigger sorted this out.
 Once I'd sprayed the sides of the cargo area I let Rachel have a go at spraying the floor.
 Another spray of guide coat once it had dried
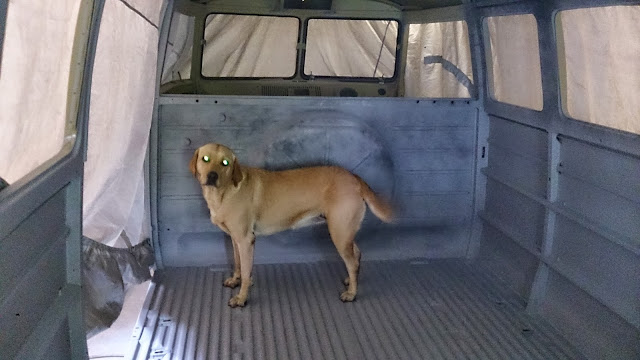
 My dog also wanted to have a go but I could not get a mask that fit.
 I then hung all the door up and sprayed them up, it took a bit of skill to get the paint into the gaps with out putting runs all over it. I reduced the fan and increased the pressure to push the paint deep into the gaps.
 I mad a Bo Bo once the doors had dried, I opened the garage door to get rid of the fumes and the rear hatch was in the way. I hit it off its hook and if clanged to the floor, I dented the inner skin but luckily the outer was un touched.
 I needed to try and straighten the warping from welding the sill so I cut a template to scrape along the wet filler, this also helped me with the low and high spots.
The high spots from the panel repair I used the shrinking disc on this heated just the parts that needed shrinking back down
 The dimples on the wheel arch skin also needed sorting I also touched up the small blemishes on the bottom of the cab doors

 Sanding and preparing is not easy on the arms it took a lot of sanding paper. I came back to different areas so I didn't get fed up and not finish it properly.

 with only a day left before the transport was booked I managed to get the cab in primer
 Trying to spray around all the nook and crannies was not easy, I could have done with a spray gun with remote paint pot.
 The last part I managed to do was the front, although with all my efforts to repair the dent to the front panel It still needed a few small adjustments, I had to let the painter have a go at finishing this off.