panel beating front panel

Short video of my panel beating attempt using a shrinking disc, hammer and dolly.

The front panel was filled with filler from a previous crash repair
Using a butane torch I heated a few of the dents.
then using a garden spray to cool the panels and shrink the panel where needed.
Trying to reach around the panel over the top and through the front light hole.

The worst of the damage is now removed from the top part, a skim of filler will be needed to take out the scratches and help with a final smooth finish. I now need to work around the light bowl area.


Engine Lid Seal Repair

One of the last jobs to do was sort out the rusty lip that holds the engine lid seal in place. The engine lid hinge carrier box section was fine so didn't need replacing, but the lip was formed from the section at the back of this and a very complex piece to make. 
I bent a couple of lengths of thin sheet on wider than the other as I didn't know how much Id need. The width was cut after I had folded the lip so the bending machine had some material to grip while bending.

Placing the seal in the new lip I measured the width to help position it later.

I then cut the old lip off from the outside.

Clamping the new lip in place I could position it where It needed to go.

I then scribed a line from the inside where I needed to cut I then very carefully I cut the inner skin below the line.

Using the narrower of the two lips I made allowed the cut to be half way thought the original spot welds, this kept the upper section in place. I used a pair of pliers to peal the lower strip out of the way.

I cut a few notches along the length of the lip to help with the welding.

I cleaned up and treated the rust on the old parts and then tacked welded along the inside edge.

The welds were grounded down and a few drain holes drilled at the original locations. bit of paint and job done.


I thought all the rust repairs were now done but then found these very aquard positions. Going to have fun sorting these out.

Roof Gutter Drain Point reposition

I decided to move the front roof gutter drain points to stop rain from draining onto the window and then rotting out the bottom of the window frame. This may be a good idea as I hope to fit safari windows and the seals don't stop the water from sitting in the bottom of the window frames.
I reckon about 30 mm from the seam is about right point for the new lip. Ignore the 27 on the gutter.
First a bit of heat on the lip. Its probable not a good mod to do if you have just had a paint job done.
Then a hammer and dolly to get the lip back into its old shape. this took a couple of goes with the flame thrower
Just in from the lip is a joint that is lead filled then finished flush. try not to get to much heat on that bit or the lead filler will drip out
Mark out the position of the new drain with some thing that will not burn off then apply heat. I called upon my glamourous assistant for this so I could get hammering as soonas the heat was removed 
I thought about using the outside of a socket to get the right radius for the drain but the ball pain hammer was good enough.
A tweak at the edges of the drain to give it a narrower shape and the job is done.
Hopefully no more rotten out front window frames

How to make a metal shrinking disc


After having a go at metal shrinking with a gas torch that has now run out of gas, After seeing a video on you tube how to shrink metal with a disc I thought I'd try and make one and see how well it worked.

I started with a piece of scrap stainless 0.050" thick, cut from a removed commercial kitchen bench. drilled a great big hole 7/8" in it to fit a angle grinder. When I stuck it on the grinder it nearly severed my hand off. It was to big, wobbled like buggery and was sharp enough to sever a man's head
To stop loosing an appendage from the disk vibrating and the samurai sword edge. I trimmed the edge to 7 " diameter and to a perfect circle to balance the disc and dull the edge.
To get the curve across the surface of the disc I attached a bolt through the center hole and held it in a vice so it was able to just spin. I placed a dolly under the disc and rested it against the vice. As I hammered I made each blow move the disc. After each rotation I moved the bolt position in the vice to set the dolly closer to the edge, I used a pointer dolly to get a steeper curve at the edge.
After each turn the disc started to look and sound more like a cymbal. I kept hitting it till the curved looked steep enough to touch the metal with out cutting it with the edge and stop the center thread of the grinder scratching across the panel surface.
The best way to describe how it works is to watch the youtube video, I found it a bit noisier than I expected, Its also hard to get a wet rag to cool hot metal in one hand while you are trying to man handle a lethal cutting disc in  the other. I think it will take a bit of practice getting the timing and movement right to get the desired shrinkage.

After a few quick goes I had to adjust the center nut to replace it with a flush one. I needed to squeeze the nut into the disc to make it fit, this made the hole a little bigger and harder to get the disc dead center. This now let me get the disc flatter on the panel making it just hit the panel high spots.

Oxalic Acid rust treatment

I discovered a cheap alternative for treating rust using Oxalic acid and warm water. I purchased this from ebay for £3.20 per 1Kg plus postage it worked out about £6 per Kg

I decided to get a few test pieces out to give it a try, using gloves and safety goggles the powder was mixed with warm water at about 500g to 5 liters 1:10 ratio and added some degreased very rusty tin ware
 This piece was half submerged for 24 hours and you can compare the results, there was still a little rust in the pitted bits but a top up with more warm water to activate the crystals that had collected in the bottom of the pot and another dip and these should be gone.
 There was a yellow residue on the parts when removed that I washed off with the garden hose, then dried quickly to stop any flash rust. These were only test pieces so on a proper job I'd remove all the paint first.
The work college that let me into this little secret said the good thing about this is it will only react with the oxidized rust and not eat into the steel so parts can be left in the pot with out disappearing.

See videos below.


Front panel damage


When I first brought the van I was aware of the damage to the front of the van but the repair filler and paint that had been done didn't look too bad a job. It is now time to see how good or bad it is.


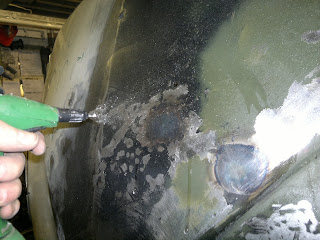
Having spent an afternoon with paint stripper that does not work and getting covered in dust with my wire wheel I got most of the filler off, just one big lump left.


There was also damage to the inside of the panel, it wasn't too bad just quite a lot of it.

With a days' work and a can of environmentally friendly paint stripper that doesn't strip paint I finally got the front of the van cleaned up. The damage was to all off the left side of the panel. There was no need to repair the panel although there was a small weld next to the light bowl that may have been used to pull the panel's dent out originally.


As I don't have or can get access to Go Go Gadget arms to reach through the front windows I figured I'd need to remove the head lamp bowl to get to both sides of the damage for panel beating. I started by drilling the spot weld with a drill bit in a normal battery drill, I soon found the drill wandering as I could not get on the spot welds square.


I then had to use an angled die grinder to grind out all of the welds trying not to go through both skins. With bigger holes than I intended the welds were free. A whack on the back of the bowl just left a dent, so where I could get access I eased the lip and released the rust with a tiny pry bar and ground down hacksaw blade


Then grinding the attachment of a dent puller to the shape of the bowls lip and a spray of WD40 I gently persuaded the bowl out without damaging it.


The bowl came out quite easily with the puller and a bit of penitence. A clean up in the blaster should tidy the bowl up.


I then used a light coat of black paint as a guide coat to cover the panel and went over it with a sander to reveal the high and low spots.
If you click on the photo for a better look you can see the beating the panel got from the previous repair and how aggressive they were with the sanding disc. I'd hate to think how much time and money it would take to get a pro to straighten this out so I can see why they just pulled out the worst and layed on the filler.
So with my new bargain priced £170 panel beating kit and panel file I'll be spending some lonely hours trying to get this panel looking better. There will probably have to be a bit of filler put back onto the panel as my panel beating skills are still at grade 1, but hopefully not a van load.


Accelerator hinge fitting and link modifcation

This was the rusted cab floor
I repaired it earlier but now needed to fit the hinge and pedal back in position.
I brought a pedal hinge from custom and commercial.
 Using the pen lines I had drawn when cutting the old hinge out  this with a drill bit through the holes helped keep it square and lined up.
I counter sinked the two holes to help get a penetrating weld, you can see from the pen lines that I nearly fitted it the wrong way around.

I then moved onto repairing the hinge on the accelerator pedal 
 I whittled this little piece from a lump of square mild steel bar and drilled the holes to suit the hinge pin I brought

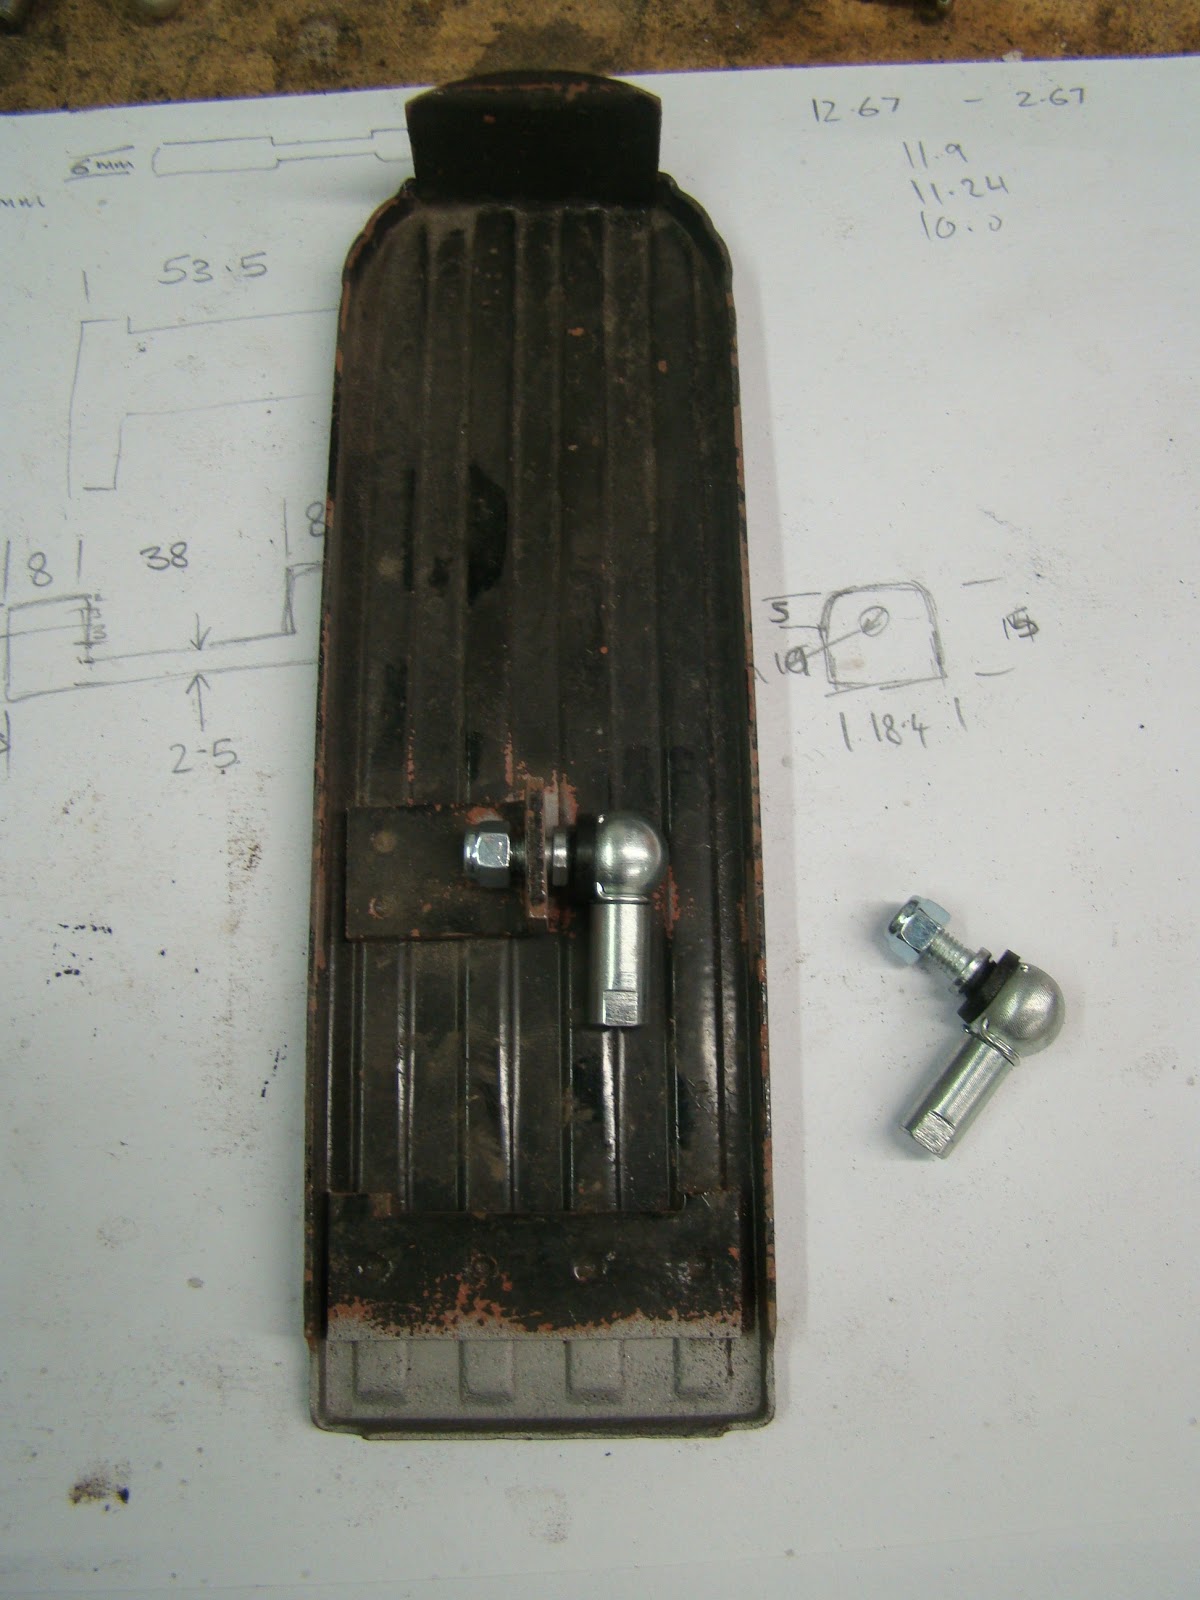
I then had the idea of fitting 6 mm track rod ends to a lump of steel that I'd weld to the pedal. But they looked to big the weld would have looked ugly and a bit of over kill. 
So i decided to open up the oval hole in the pedal and make a bush to fit a 5 mm ball joint
The bush was turned with an interference fit and squeezes into place with a bench vise.

with the hindge in its position I needed to fix it in place.
 I was going to mig weld it but thought Brazing would look neater I've never braised before so this should be good.
The only thing I had to get a hot enough flame was an Arc welder and some carbon rods. 
These rods once slid together ignite from the current from the welder, as they burn shorter you slide them slowly together, until pulled apart to stop them so the current can't bridge the gap.
 I probably over did it with the heat and the ammount of braising rod I added between the gaps but the lower hindge is going nowhere, Just have to clean of the slag.
 Under the cab floor the two angle's that hold the drilled out nuts where the rod goes through to link the pedal to the cable were also oval from ware. I opened these up, but had to cut a drill bit down to fit under the floor.
I then made a couple of brass bushes to squeeze into the holes that would fit an 8 mm round steel bar.
I then cut, radiuses and bent a piece of flat steel bar and turned a tube with a shoulder to fit in the lower end braised it in place and drilled a 5 mm hole for the ball joint at the other end and taped a hole fro a 4 mm grub screw.
These are the parts laid out ready for mockup.

Then put together on the bench.

I then painted them up pushed the bushes on the rod, that scrape the paint off. assembled all the parts and then drilled through the grub screw hole to make a dimple to locate the grub screw once the angle a position was correct.

There was a little friction in the mechanism I probable put this down to not drilling the brass bush holes parallel to each other.