On a trial fit on the van some thing didn’t look straight, so I  decided to lay it against the door. Opps, getting carried away with the welding has warped the panel from the heat, this is a lesson learnt. Ill either have to cut this into three parts to straighten it or start again with a new panel. Those NOS front arches I saw for £320 so long ago don’t seam so extremely over priced now.
Hi welcome to my 1964 VW Type 2 split screen campervan restoration blog. This will be a record of the vans restoration, and hopfully share infomation about bringing a splitty back to life.
wheel arch (Dog leg) Pt 1
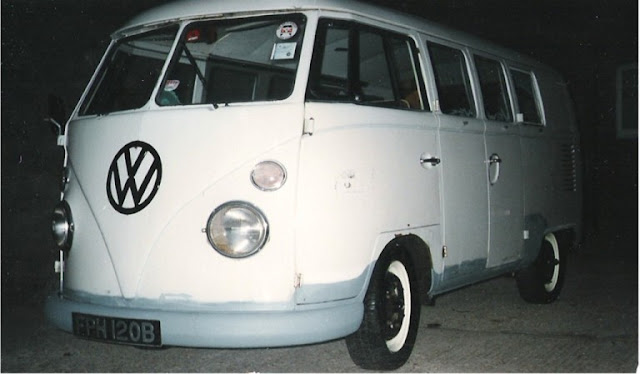
Life before its slumber
 Although a lot of my stuff stored in the damp garage was destroyed I’ve managed to recover a few photos of the van before parts started being pulled off.
It’s amazing what fresh paint on the wheels and badge can do, and a can of primer can hide all sorts of rust.
A trip to Beetle Bash and with the van parked up ready to watch the drive-in movie. The trophy unfortunately isn't for best paint but for the bug push, didn't realize how sticky the drag strip is until I tried to push a bug down it.
The Stonehenge took the longest to do, but my favorite part is the sun burst flames.

The lyrics that stretch around the bus were penned in with dry marker; well that’s what I thought. As I washed the paint off after the weekend trip, I found strategically placed letters in permanent marker spelling out all sorts of rude words!
Door pillar replacement
Where to start (front valance)
Seeing that access within my garage is limited to the front or back of the van. I've decided to start at the front valance working towards the rear. The valance was originally patched up when I first got the van to keep it on the road. To get rid of all the rot the whole lots coming off.
Grinding away the filler revealed the rust hadn't spread up the front panel too high.
Instead of drilling off each spot weld, with help from a chisel I cut and peeled away the rusty panels, without any drill holes this keeping the good material , all it needs is cleaning and beating straight before the new panels goes on.

Cutting the old metal is the easy bit, fitting the panels is going to take a bit more skill. But before the inner valance goes on, the right hand chassis front closure plate needed replacing, and the lower door pillars are too bad to weld, so need to be replaced.

The joining plates that fix between these also need to be fabricated, a piece of angled plate would do the job but I'm not sure what strength is in this join. So, I will fabricate this as close to the original as I can get using the bits I've pulled off as a guide.
The joining plates that fix between these also need to be fabricated, a piece of angled plate would do the job but I'm not sure what strength is in this join. So, I will fabricate this as close to the original as I can get using the bits I've pulled off as a guide.
cleanup
The rescue
I had to get two other abandoned cars moved plus the unfortunate death of my 72 square back (may it RIP) to finally get access to the vans tomb. Not to worry, anything usable on the type 3 was saved including the IRS gear box and axles.
After 10 years of slumber and with help from some friends the van was awoken from its dreams of mountain roads and sun scorched beaches.
Subscribe to:
Comments (Atom)


