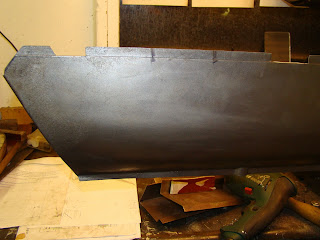
The outer sill repair is an old repair I had my uncle help me do when I first got the van to keep it on the road, this was in the last century by the way! This ancient repair was done with a panel that didn't quite fit and needed re-doing. So using the top quality Autocraft outer sill repair panel I measured and trialled it on the van, marking along the top edge and using tape as my guide and allowing for an over lap, I cut away the old repair and rusted outer skin.
I unleashed a new tool as recommended in a Volks World employees project car article, this tool is used to joggle the top edge of a panel, this is called a roller joggle. After reading the instructions and trying a few scrap bits I proceeded to roll the tool along the length of the new panel. I wasn't satisfied at first with the depth of the joggle so I adjusted the wheels closer, this gave me a deeper step (still not what I needed for the thickness I was using) and it stretched the material giving the top of the new panel a nice wavy edge that any child's play ground slide would be proud of. After a few $£%^ and &*£$ got thrown around the garage, I often let rip with a F Bomb when I'm alone, but more importantly without buying a new panel or shrinking hammer I'd try and salvage the situation with a few small cuts down to the joggle line to relieve the stretched material.


Knowing that these long panel repairs can turn to chaos if you're not patient with your welding I decided to try and give myself a helping hand. I used a couple of bits of wood clamped either side of the panel to help keep it flush and flat (although shielding the light it also helped keep my welding torch straight) even though the repair panel did had a few wobbles here and there. This only worked up to a point, as the wood would still bend. So I tried a piece of angle iron, this was OK until I snapped the arm of one of the clamps, and the skin still moved when I released the clamps. F Bomb time again.
With the clamp repaired (a bad craftsman rewelds his tools?) I tack welded along the length and tried to patiently space my welds along the whole length of the panel. I couldn't get a good penetrating weld unless I held the welder for long enough for the panel to get too hot, so there are a few places where the sill is a little buckled. I then straightened what I could and spot welded the lower edge.
That spot welder is not light and is hard to handle when lying on your back. With the welds ground down the panel looked reasonably straight, I'll have to come to terms with the fact that I'll be buying a XL pot of filler to get that flat panel look.
I like the word joggler, I'll be dropping it into polite conversation every chance I can!