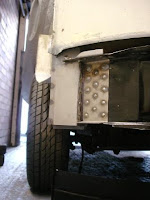

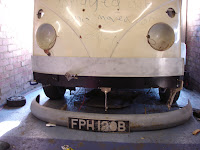
Well back to the job of repairing the front valance again. I’ve been going back and forth to this job for too long now and I decided to post the work once compleated..... ish. With the joining brackets fabricated I set up my new 160 amp welder to fit these on. Wow how much easier it is to weld with decent kit (although I’m still not perfect), the small old hobby welder I’ve been suffering with will defiantly get the boot. The bracket was tacked on with ease and the lower flange I decided to bend to the profile of the closure panel when its trial fitted.
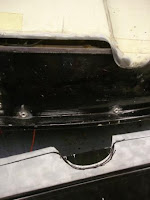
I drilled and tacked some nuts inside the valance for attaching the cab floor belly panel because unfortunately this panel didn’t have the forming for these, I then trialled the valance front closure panel using the lines drawn on tape Id marked as a datum long; long ago. With a bit of forming at the ends and re-measuring, the panel went on with no problem. I tacked the lower part from the inside the valance and discovered the joys of welding upside down. The welding burns are a lesson learnt, and it could get hot and sweaty stuck in a garage with all that protective gear now the summers coming.
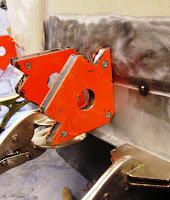
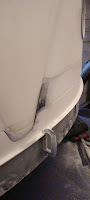 I received the new lower front panel (which I specially requested without the cut out for the nose and longer at the ends so I can fold it over like the original.) Rather than butt weld this panel I joggled a small lip on the repair panel to sit inside the original one. I ground a ton of filler off the front panel so I could ensure the repair panel was straight, although a bit tricky around the nose; using some fabricating magnets and clamps the panel fitted OK.
 Eager to get the panel on I started tacking it together, then double checking the fit before I went welding crazy I noticed that the joggle at the left corner end of the panel was overlapping to much, and causing the curve of the panels not to sit flush. Access to the back of this panel is very awkward because of the front light bowl and inner kick panel, this ruled out any fabrication from the back. So I painstakingly cut the joggle off from the front with a cut down junior hacksaw clamped in a pair of pliers. This did the job of letting the pannels sit flush, and then with the magnets in place I continued to tack it all together.
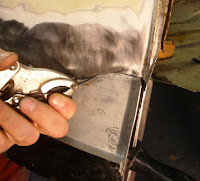
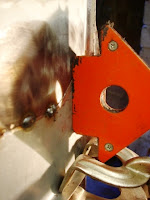
 Learning from my cock up with warping the dog leg panel I spaced out the weld points and spot welded the a seam between the two panels with only a second spent on each weld, but still the original part of the panel had a slight ripple along its curve. Not sure if I’m being to particular about my work or still have a lot to learn but I'm determined to get it right. So I guess Ill rely on the paint prep to get rid of any imperfections (filler).
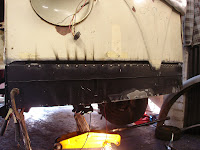
I cleaned up the welds and with a few tacks along the lower lip and tidying up the wrap around part of the edges this job is finally finished.

 I think I've been a bit sidetracked sorting out the brake conversion instead of getting all the welding completed, probably because it's more fun seeing shiny bits coming together.
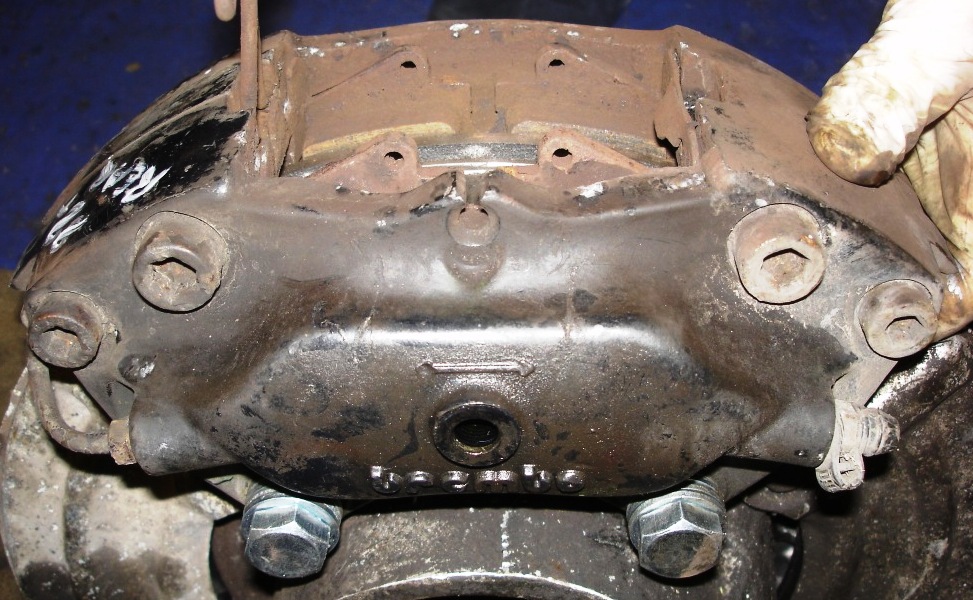

 The caliper is a pretty tight fit in the back off the 15" wheels; there is a slight rub on the wheels' inner shoulder where it rubs on the front caliper face so I'll need a wheel spacer of about 6mm to get the minimal clearance all around. It's not what I wanted to do. But it's something I'll have to live with.
 I popped down to a local Porsche show room in my bug to collect some caliper mounting bolts, after a scan of the 911,s I was greeted by a pretty lady behind a desk asking if I would like any help, explaining why I was there and a phone call later a suited gentlemen arrived with my £6 bag of bolts, a little surprised I paied and started to ask about caliper piston sizes and brake master cylinders, "sorry I don't study the breaks" silenced I decided it was time to leave. You can't beat speaking to a grubby mechanic who knows there way around the cars they work on.
 With new bolts I mounted the front caliper to the wooden bracket I'd made and with the bearing spacers fitted I was able to work out that I needed 11mm offset to centralise the caliper on the disc. I'll now have this bracket machined once I decided the best place to position the caliper around the spindle. Although I'm still unsure if I should use my link pin or ball joint spindles and beam.


