
With just a coupe of days left to prep the van before its booked for paint I decided its probably more important to drill off the belt line trim than get the rest of the body prep done that the paint shop will be going over anyway.

With some help from a mate We spent the day fitting the doors and rear hatch and aligning the gaps and getting the swage line straight before starting on the trim.

I then raided my new parts stash locked in the spare bedroom and dragged out the belt line trim. This is from VW Heritage which I think is produced in the far east, the quality is not to bad comes with all the parts and it has the screw holes already countersunk unlike some other kits I've seen.
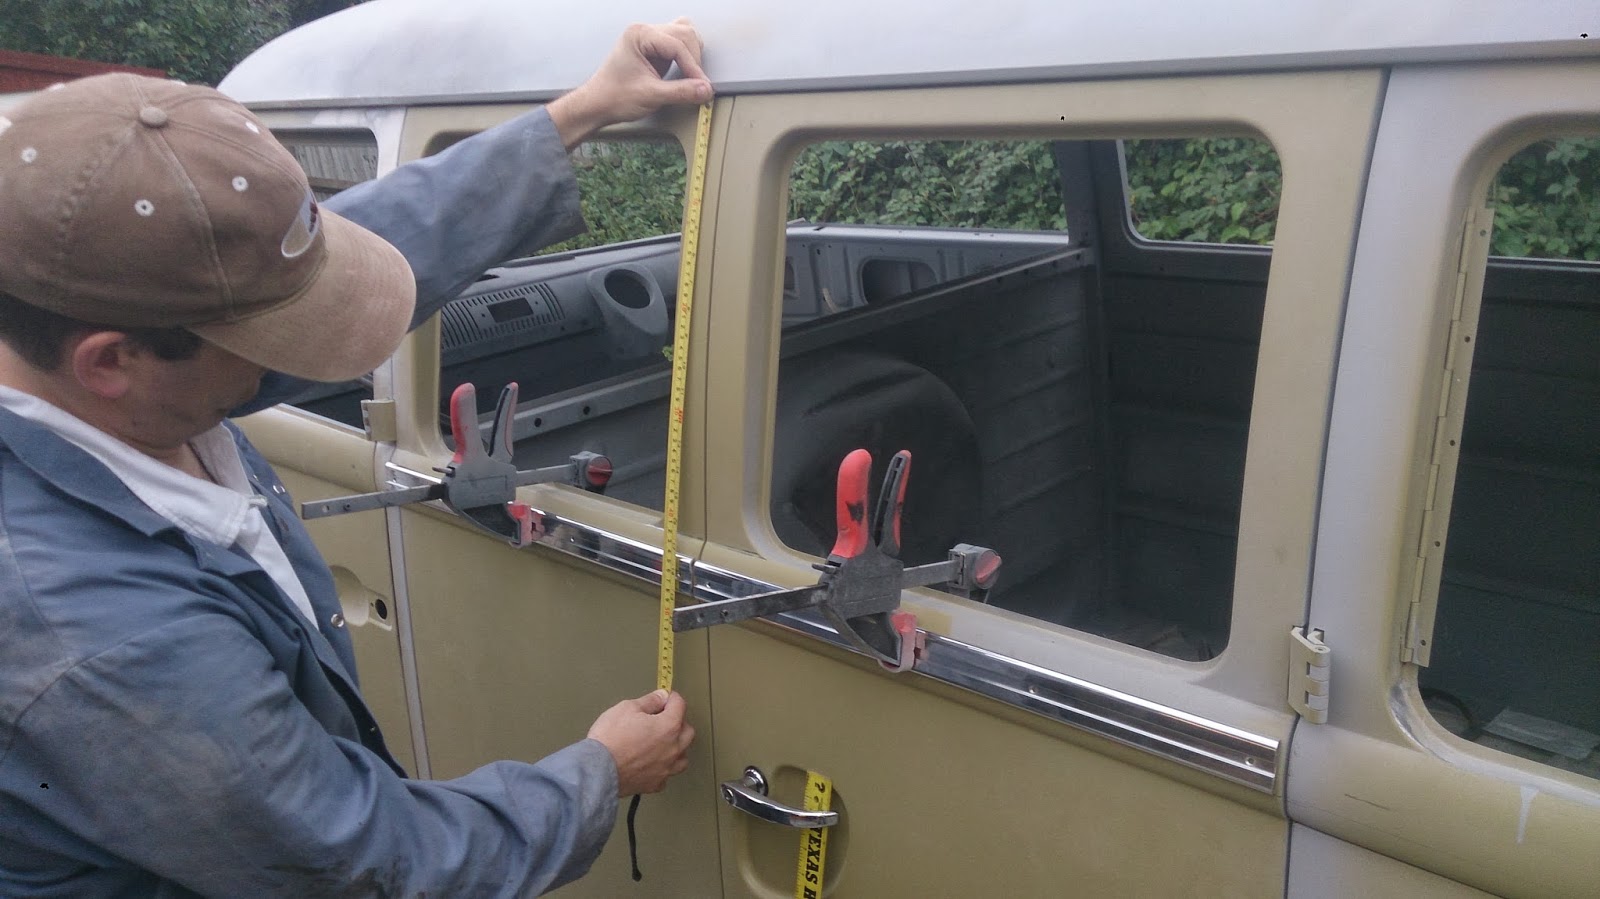
I tried to look on line for a how to but didn't find any thing that helped, there was a article in volks world magazine but I'm yet to find out which date. We decided to start at the cargo doors as this is where the most variation would be.

Using a measurement from the gutter for squareness and eyeing up down the side of the van to position the height so the flat face of the trim looked equal to the curve of the out side of the van, this positioned the trim proportionally lower on the swage line.

Once we were happy with the position of the first piece of trim I punched the centre of the first hole. I used a 2.7mm drill. As the bit started to cut I checked the position of the hole again and adjusted as required before it broke through the skin, making sure the drill chuck did not hit the trim as it broke through.

Due to the angle on the thread of the screw, as you screw it into place it tends to wander, if you let it continue the head of the screw will push the trim away from the centre of the hole, to counter act this as the screw was in a couple of turns I knocked the head back into centre.

I positioned the back piece next after doing the door using the measurements and the same technique as the cargo doors, the only problem I had was one of the end holes that also held the end caps was positioned over the seam of the doors inner skin so the screw would not go through.

To get the back corner pieces to fit I started by getting the curve on the rear corners to match with a bit of heat and bending over my rear bumper, this took a few attempts to get right.

With the corner now fitting the curve it now raised as it went around the corner, I twisted this out by holding one end in a work mate.
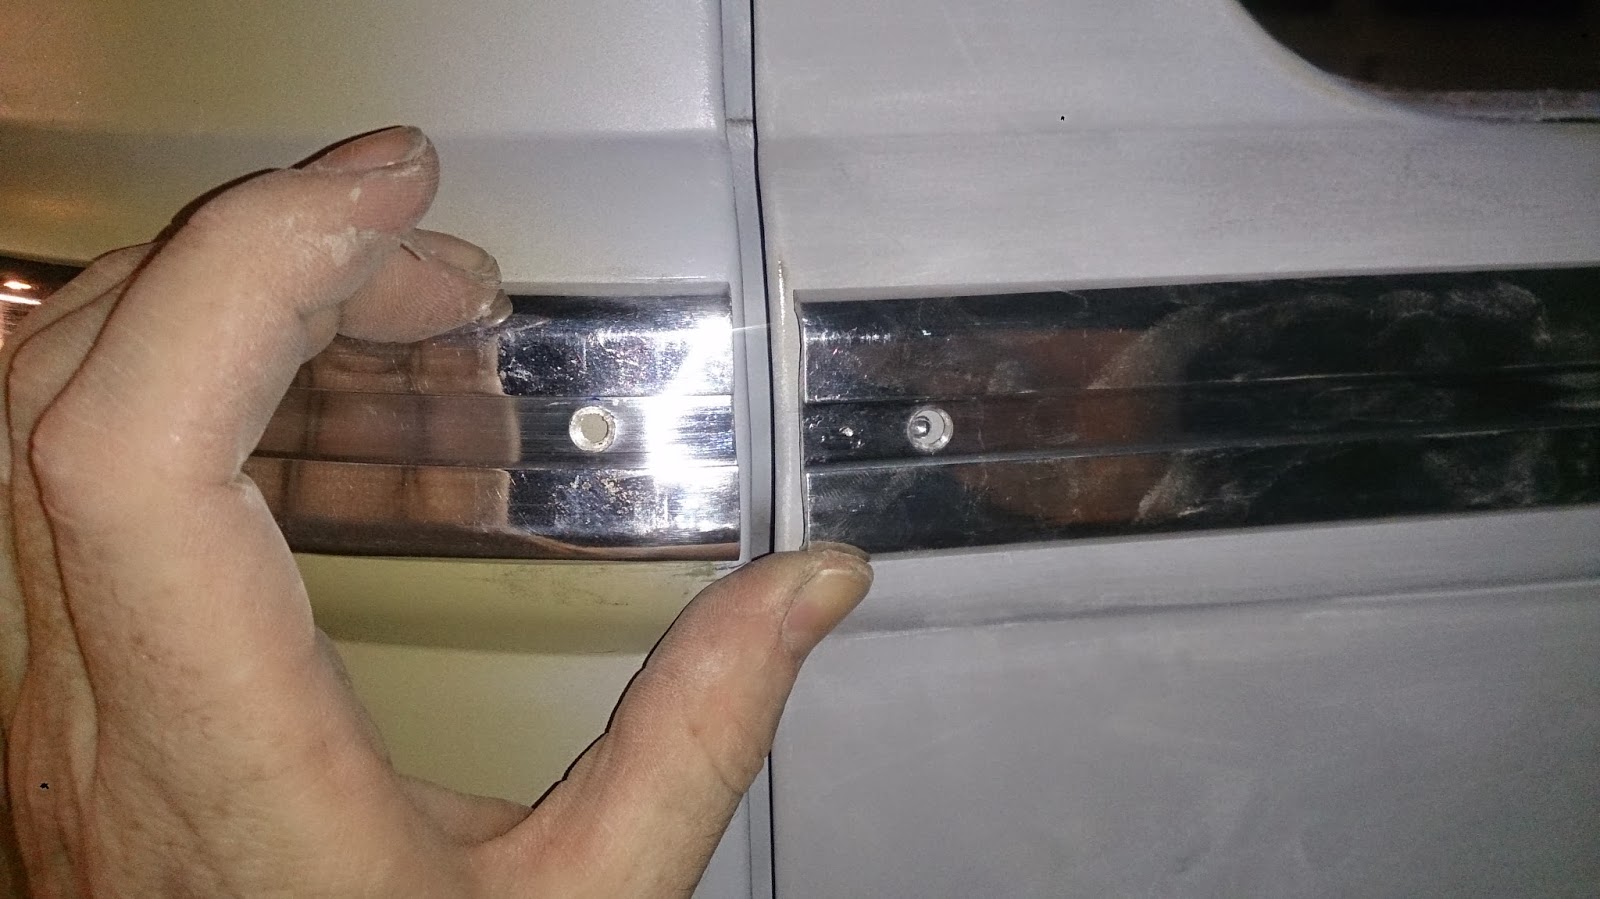
There was a small lift where the two pieces met but I was able to pull this down with the position of the screws.

Placing the door pieces was easier because they curved down and you just needed to position the back of the door in the correct position. the small piece between the doors shows the extent of the problem with the screws twisting, this was remedied by straitening the head of the screws with a block and hammer.

With the day light finally faded and the transport booked for the morning I had to leave the trim just fitted to the one side, tapped up to protect it.
Ill add the rest once its back from paint.